
Atlas Packs Athlete Camera Pack Road Test Review
I have a love hate relationship with camera bags, and I always have. As a photographer, I should be in the love camp. In theory they’re supposed to make my life easier, keep my gear protected, and be reliable. In reality, I often find myself on the other end of the spectrum, frustrated by camera bags that promise the world and deliver very little. The intentions are always good and the offering of a simpler workflow with comfortable carry and greater protection sound magnificent on paper. However, in reality, I often find that it translates to a boxy thing on my back.
Now, that’s just my personal opinion, and I know that some photographers will take protection over everything. However, for me there is a balance between keeping my cameras locked away in the most protective case, and letting them run free and do their thing! My cameras are tools and I want to be able to bring them with me and use them. More recently I’ve found myself defaulting to under the radar camera slings, or my own favoured backpacks with an insert that I like, sometimes even a homemade solution using clothing as the protection. People often say that the best camera is the one you have with you, I feel as though the same theory can be applied to camera bags, the best one is the one you’ll have with you; the one that allows you to take your gear to the best places, to capture the best shots.

So, for the past five years I’ve accepted my fate that there isn’t a camera bag for me to rule them all, there are some very good ones that I turn to, but ultimately I hadn’t found the “one”. My criteria for “the one” was pretty straight forward on paper. It had to carry excellently (20-40lbs of gear gets tiring very quickly), get me into hard to reach places with my gear, it had to have genuinely useful features, and it should be disguised and not advertise the payday sitting on my back. Could the Atlas Packs Athlete Camera Pack be the one I’ve been looking for?
Who’s it for?
If you are Outdoor enthusiast or content creator who is looking for an excellent hiking pack, which is also an excellent camera pack, then look no further. With the capability to handle almost any professional camera set up, ingenious functional features, and excellent materials and build quality, you’ll be amazed you’ve used anything else.
Who’s it not?
If minimalism is more your style, and you don’t like straps on your bags, move on. The Athlete is designed for life outside, and that’s where it thrives. If your setup is smaller, maybe a single body and lens, you may also want to look elsewhere.
Construction and Materials
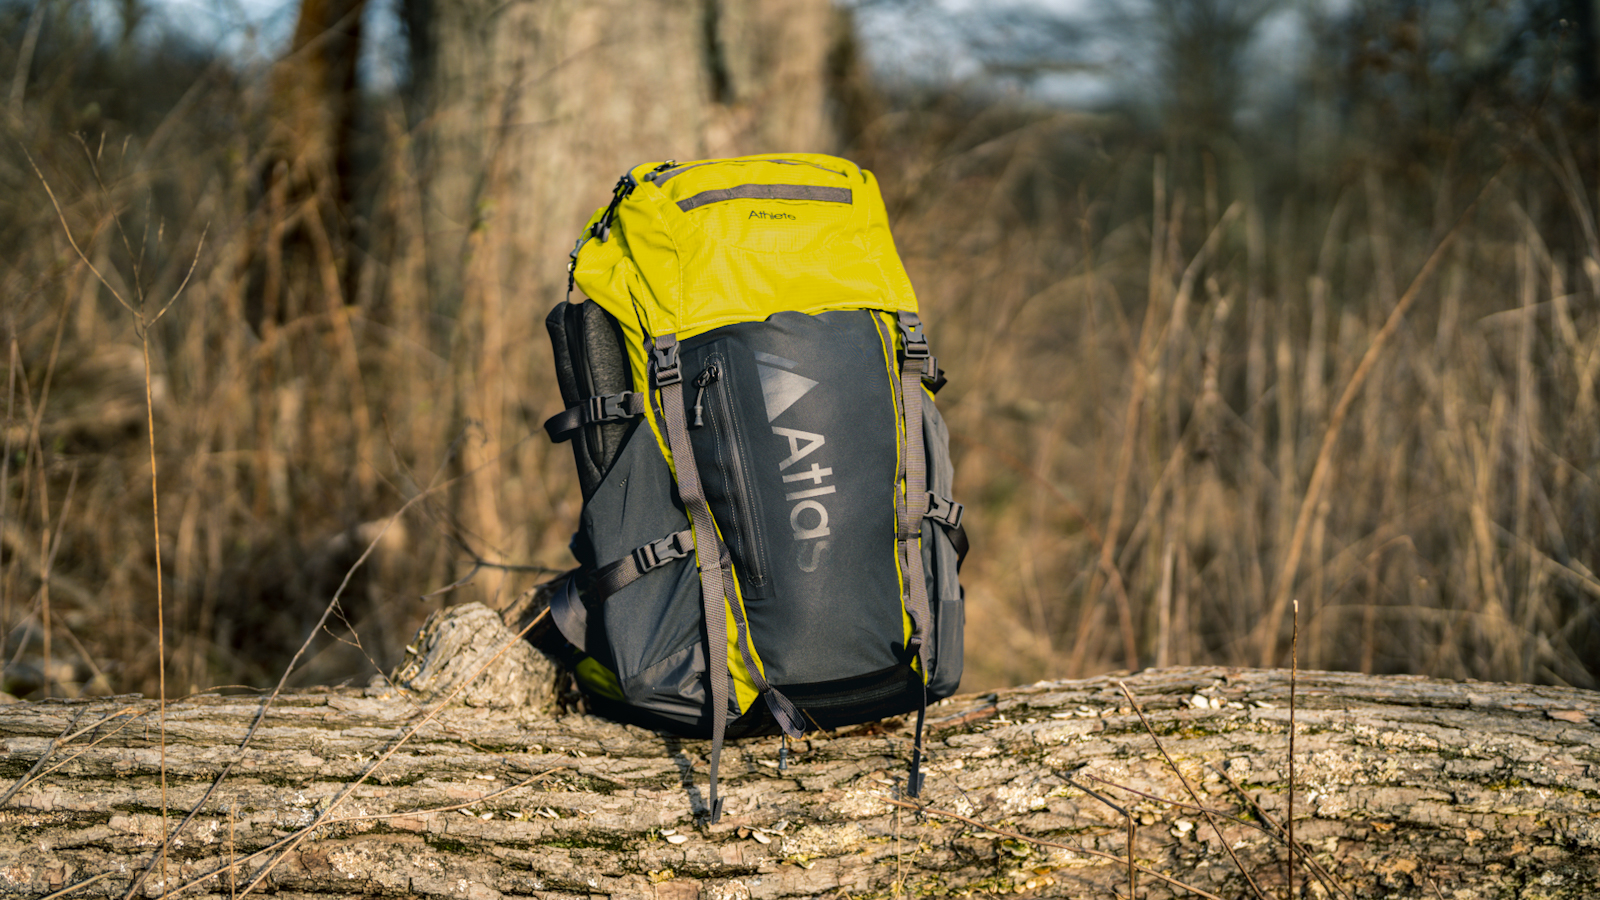
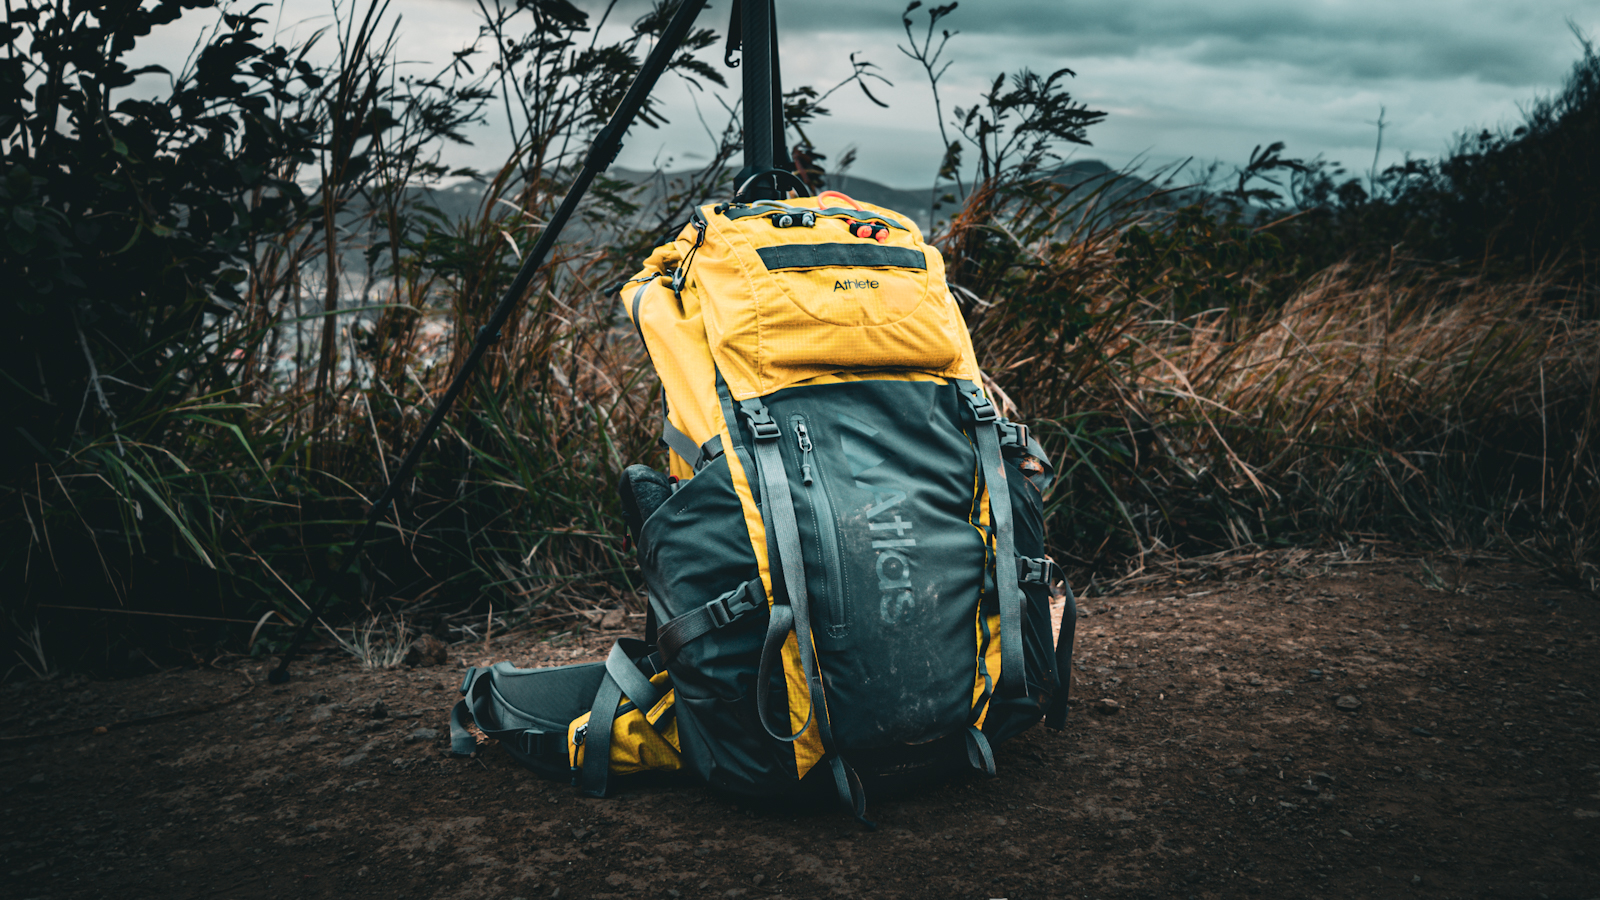
I think this is an exceptionally important piece of the puzzle for a good camera pack. When your livelihood is coming with you, you want to know not only that it’s protected from a padding point of view, but also that the materials are good quality and the manufacturing is up to scratch. It’s not hard to put up to 50lbs in a camera pack, so reliability is key. With the Atlas Athlete, I had no concerns from the snowy day I unboxed it, and I still have no concerns now after almost 10 months of use and abuse. A 240D ripstop shell is a great balance of durability and weatherproofing, not once in my use have I been concerned about its robustness. Atlas Packs have a mantra that a happy pack is a dirty pack, and this pack has been around the world, taken a fair beating, got dirty, been wiped off, and come back for more without wavering.
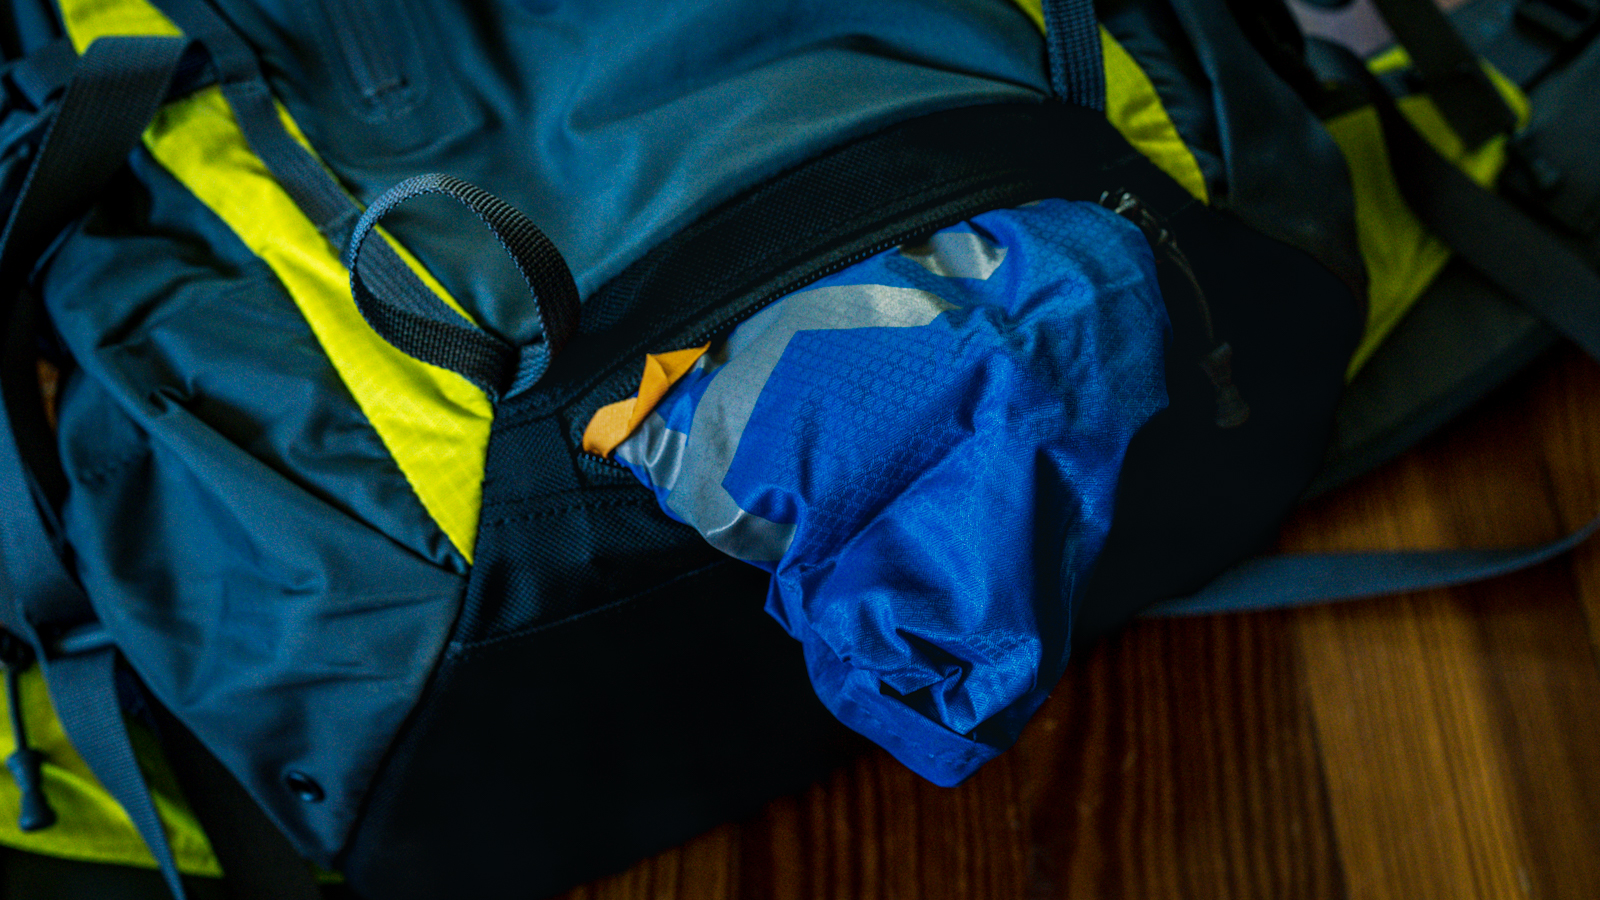
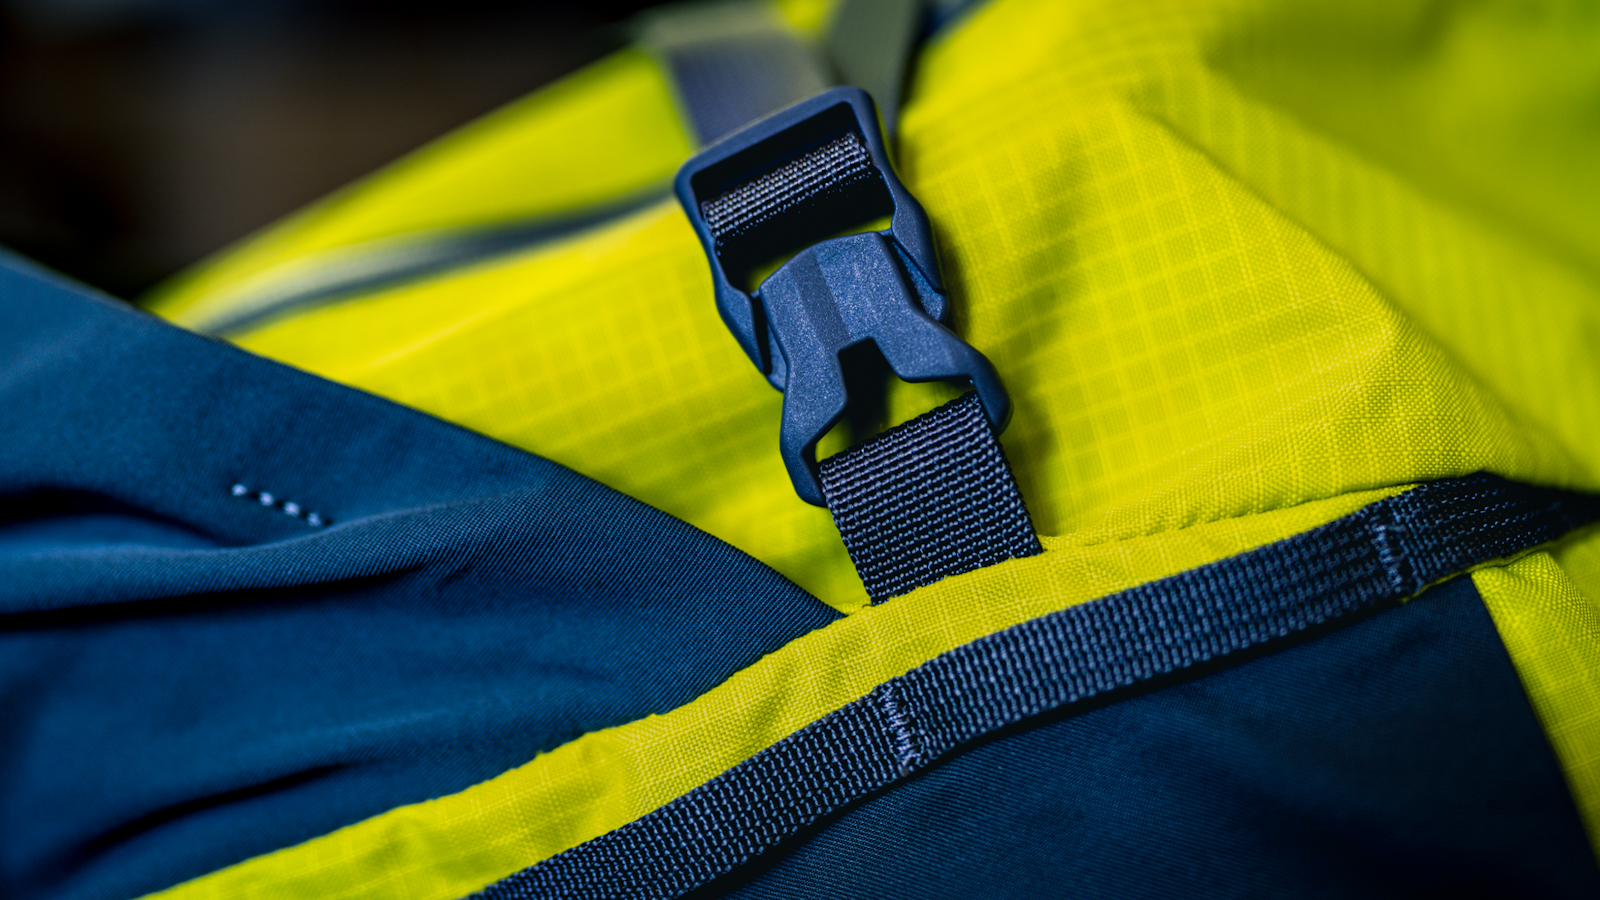
There is a detachable and stowable rain cover zipped into the base of the pack should you need extra protection from the elements. Internally the 10mm thick dividers provide plenty of protection to stop your lenses and bodies becoming too closely acquainted. Sturdy YKK® zippers and hardware make access a breeze and these buckles and zippers have actually become one of my most appreciated parts of the pack. They are easy to adjust and manipulate, even with gloves on in the depth of winter. I love being able to adjust quickly on the move when shooting, and material and hardware choices such as these make all the difference.
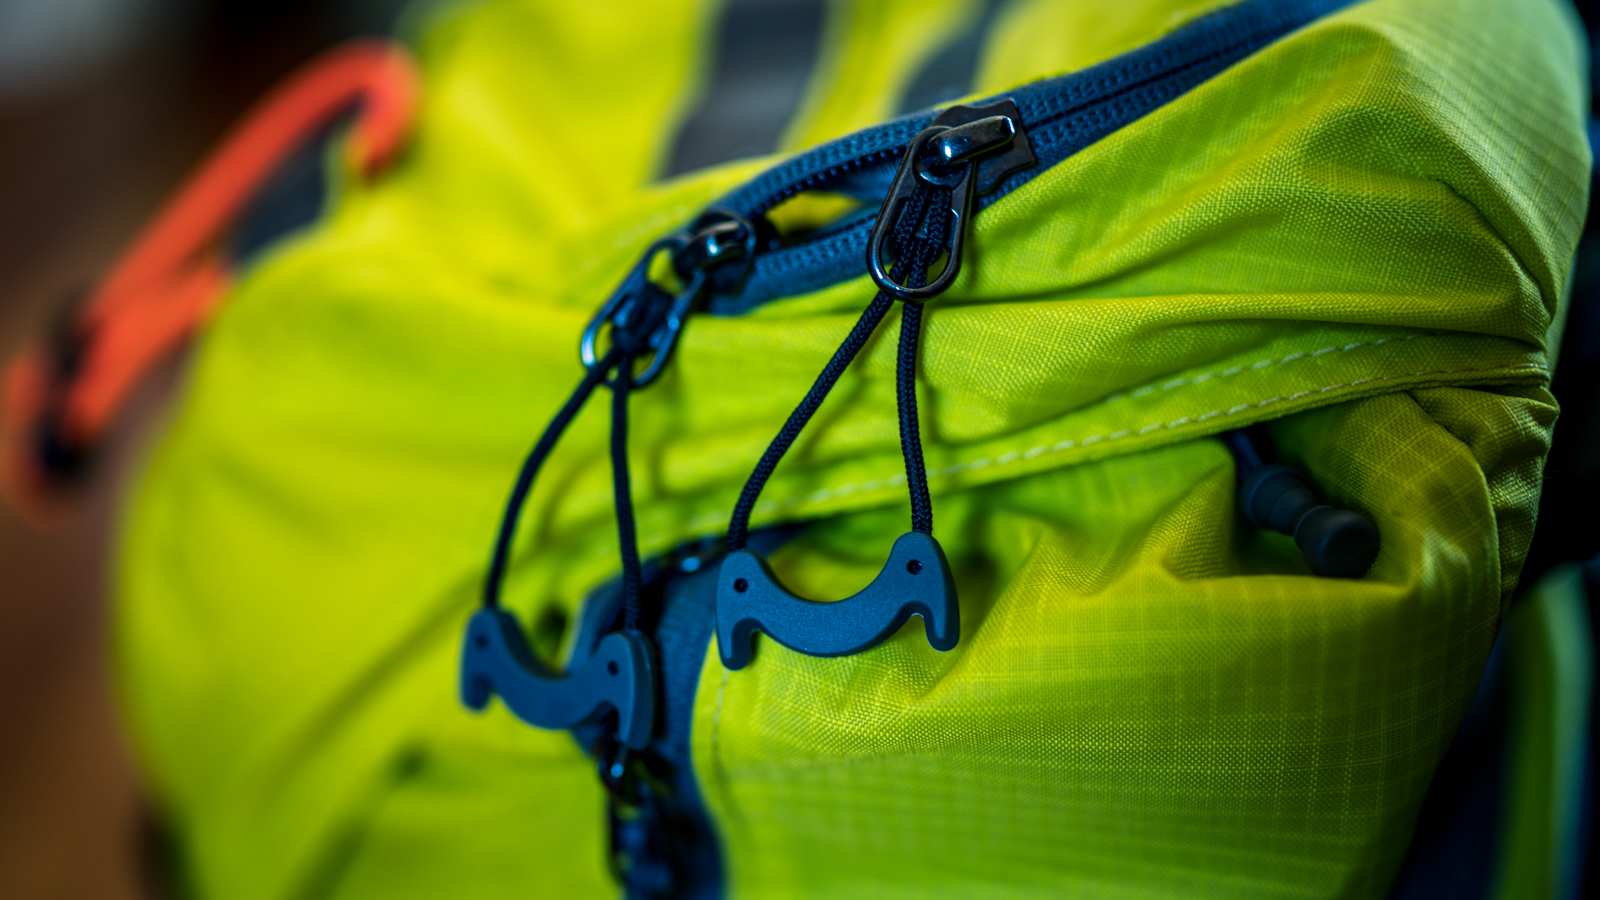
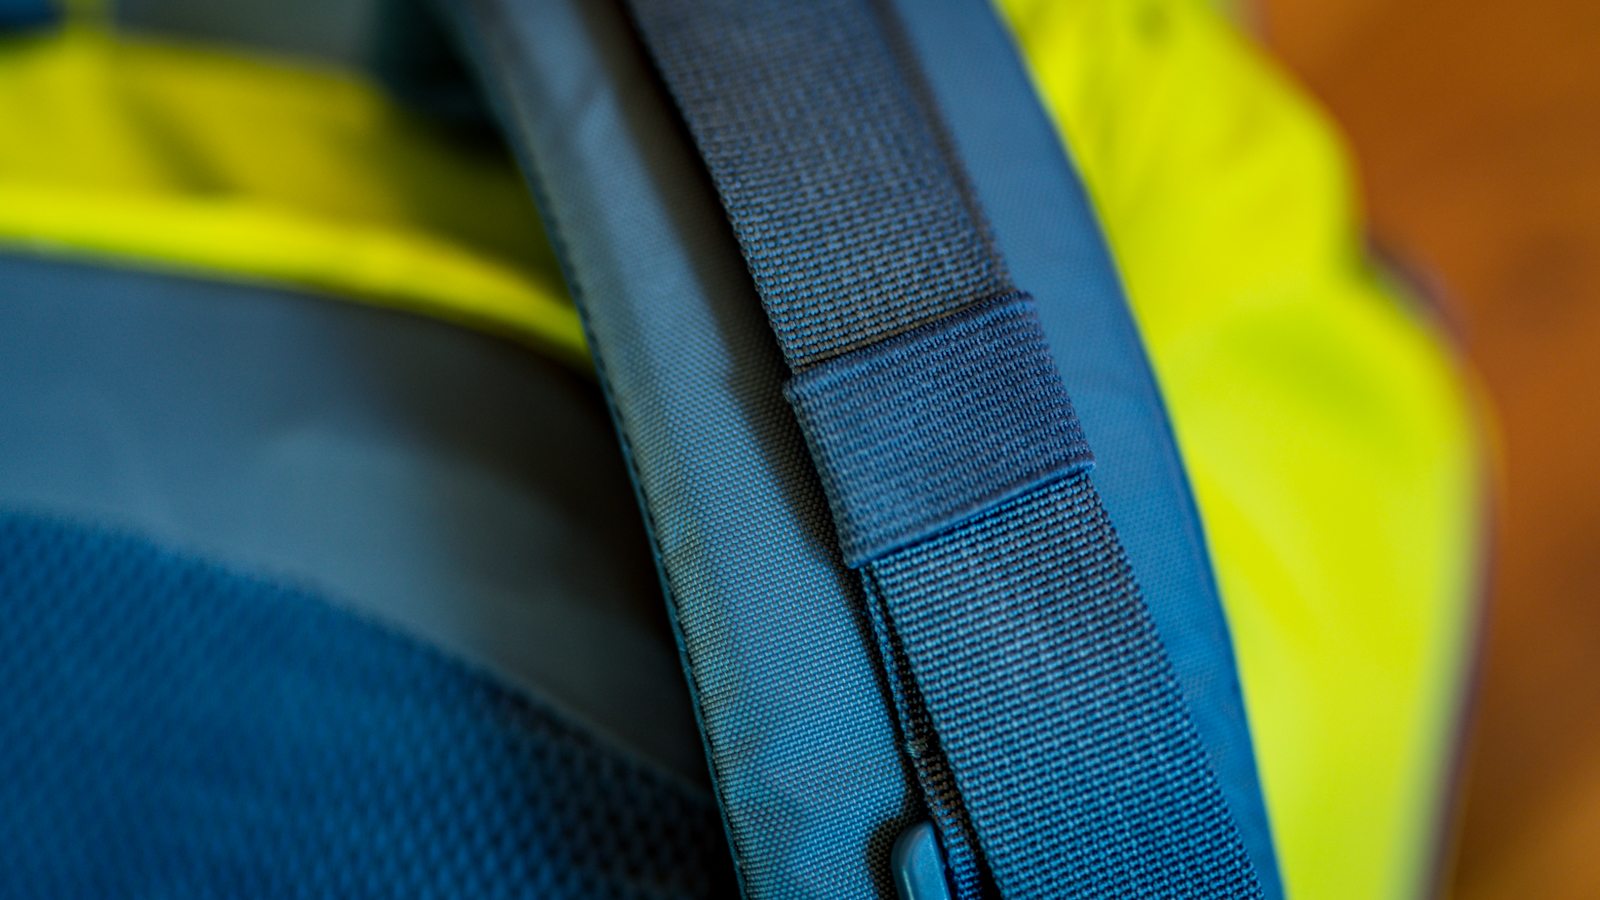
The same applies to the sturdy webbing used around the pack–simple, reliable, and easy to interact with. Elasticated strap keepers help you manage any dangling strap ends and keep them out of the way, which I love, no one likes straps flapping around! I know at Carryology we love to wax lyrical about some pretty technical materials, but sometimes simple can be best, and in my experience, for photography packs (and cameras in general) reliability is key. It is a constant theme throughout the pack, and is likely why I’ve grown so fond of it.
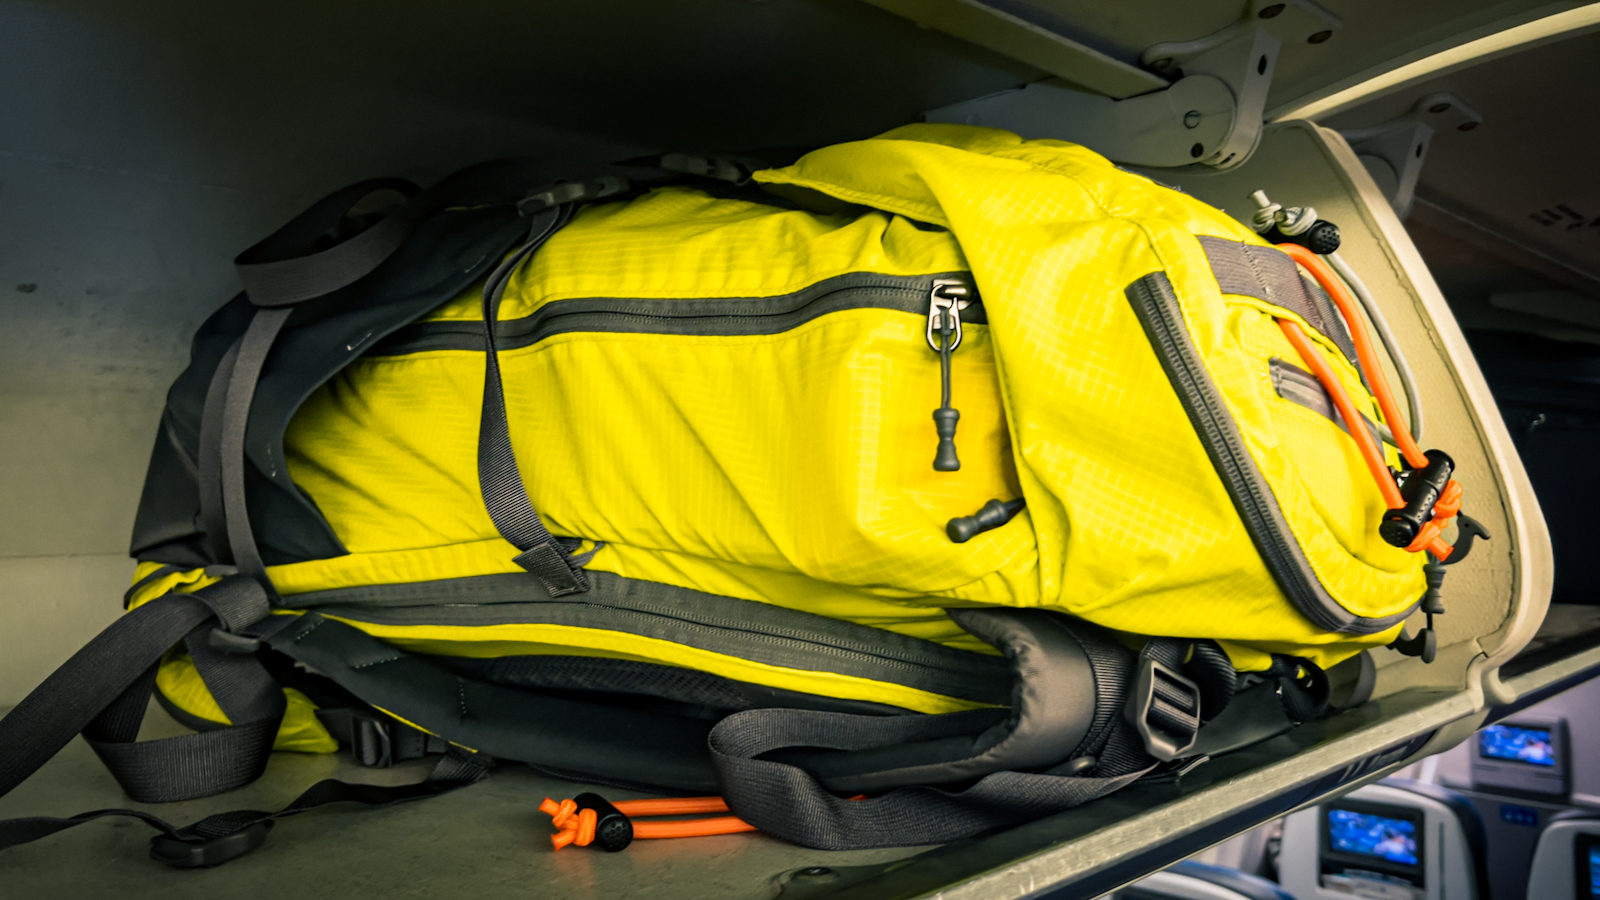
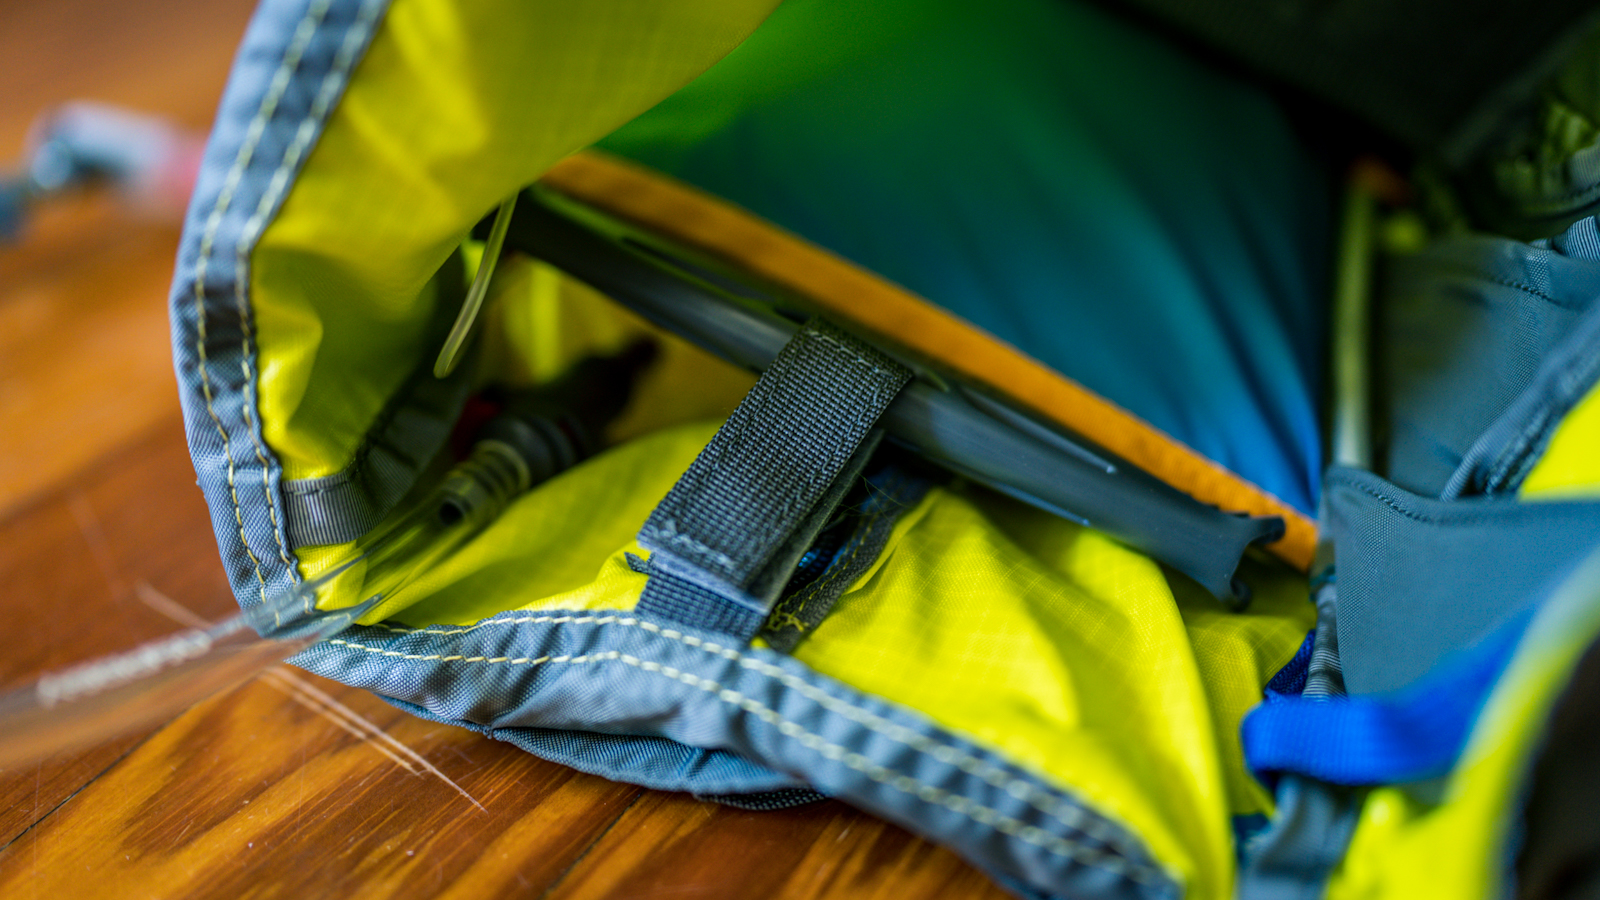
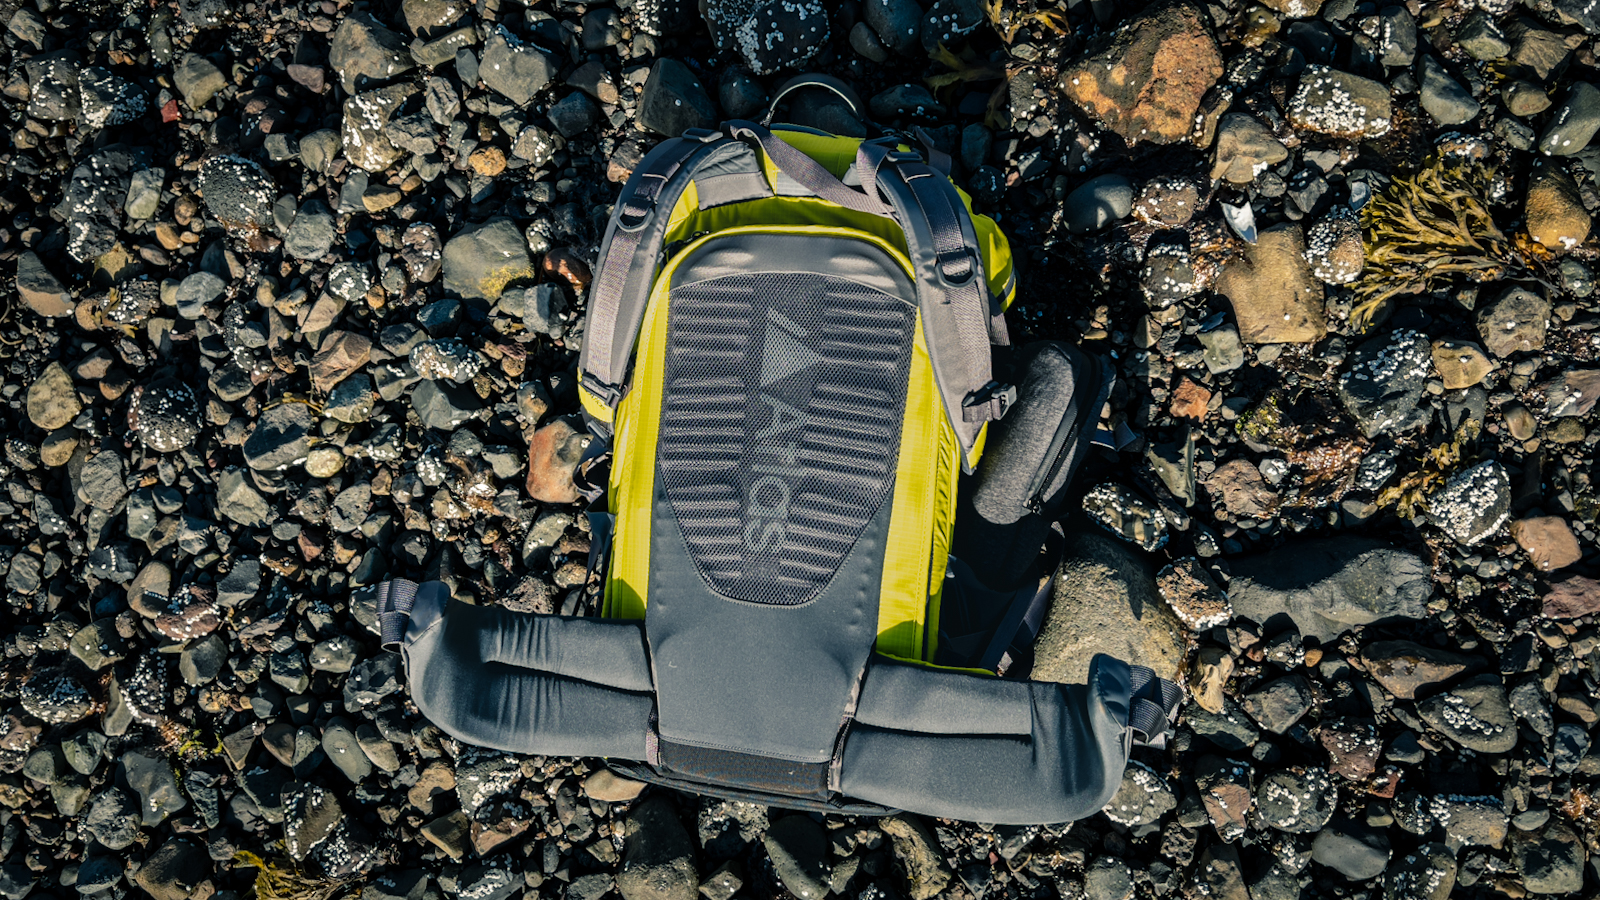
A removable aluminium frame/stay allows you to compress the pack smaller should you desire, and is easily inserted/removed when needed. It fits into overhead cabins or airplanes with ease, something I really appreciate. The Athlete is the smaller of the two packs offered from Atlas, and comes in three colours and two sizes. Their excellent fit guide will help you choose the best option.
Organisation
Where to start? This can be a contentious point amongst photographers. Some love an ICU for the flexibility and some love built in protection. Well, why not have both? This is one of the areas for me where the Atlas Packs both stand head and shoulders above the rest. The Origami Camera Core  is hands down the best way to carry camera gear on your back. Now I hear what you’re saying “X, Y, and Z have customisable cubes!” etc. etc. However, the OCC is really the best of both worlds, elevated.
The OCC is really quite ingenious, with a simple tug of the loop or a push of the core, you can either gain around 3L of gear space in the main compartment or extra room for another lens/body combo. This feature makes the pack really excel for travel, because now the Athlete just became your daily pack too. You can quickly dump some unnecessary camera equipment at your abode, and use the extra space for whatever adventures lay ahead! This proved to be useful for extra food, clothing, or towels. I think where the OCC excels is its clean function. There is no “unsnap this, twist this around, and there you go” it is a quick and clean motion that takes no time at all. With the Athlete you can’t help but feel like you’ve cheated the system and got an excellent hiking pack, camera pack, and day-pack all in one.
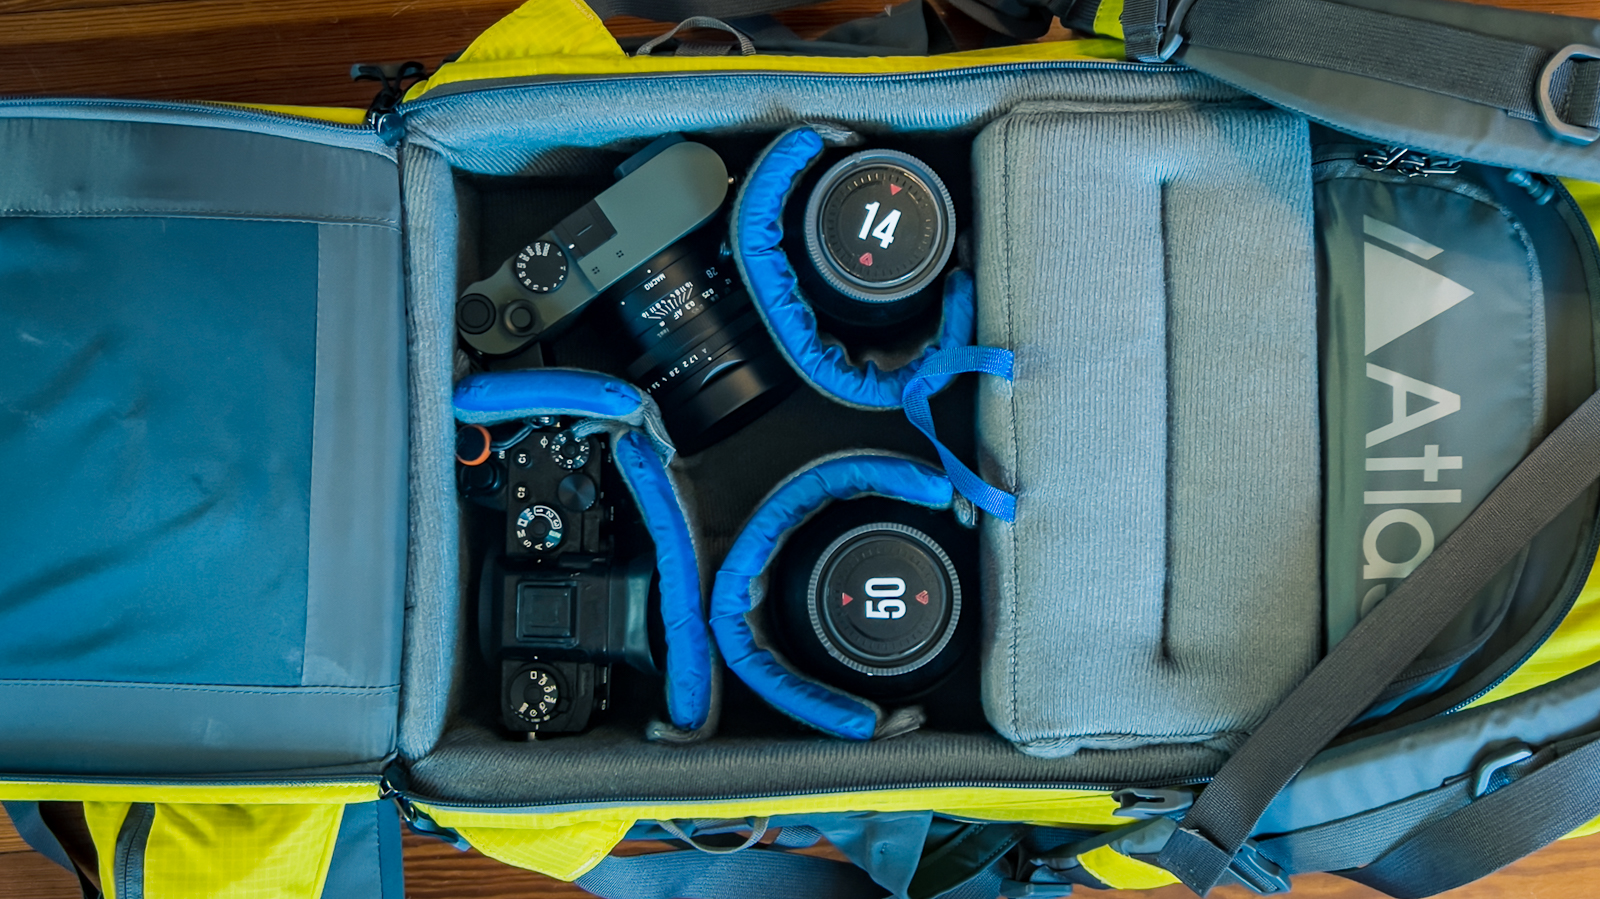
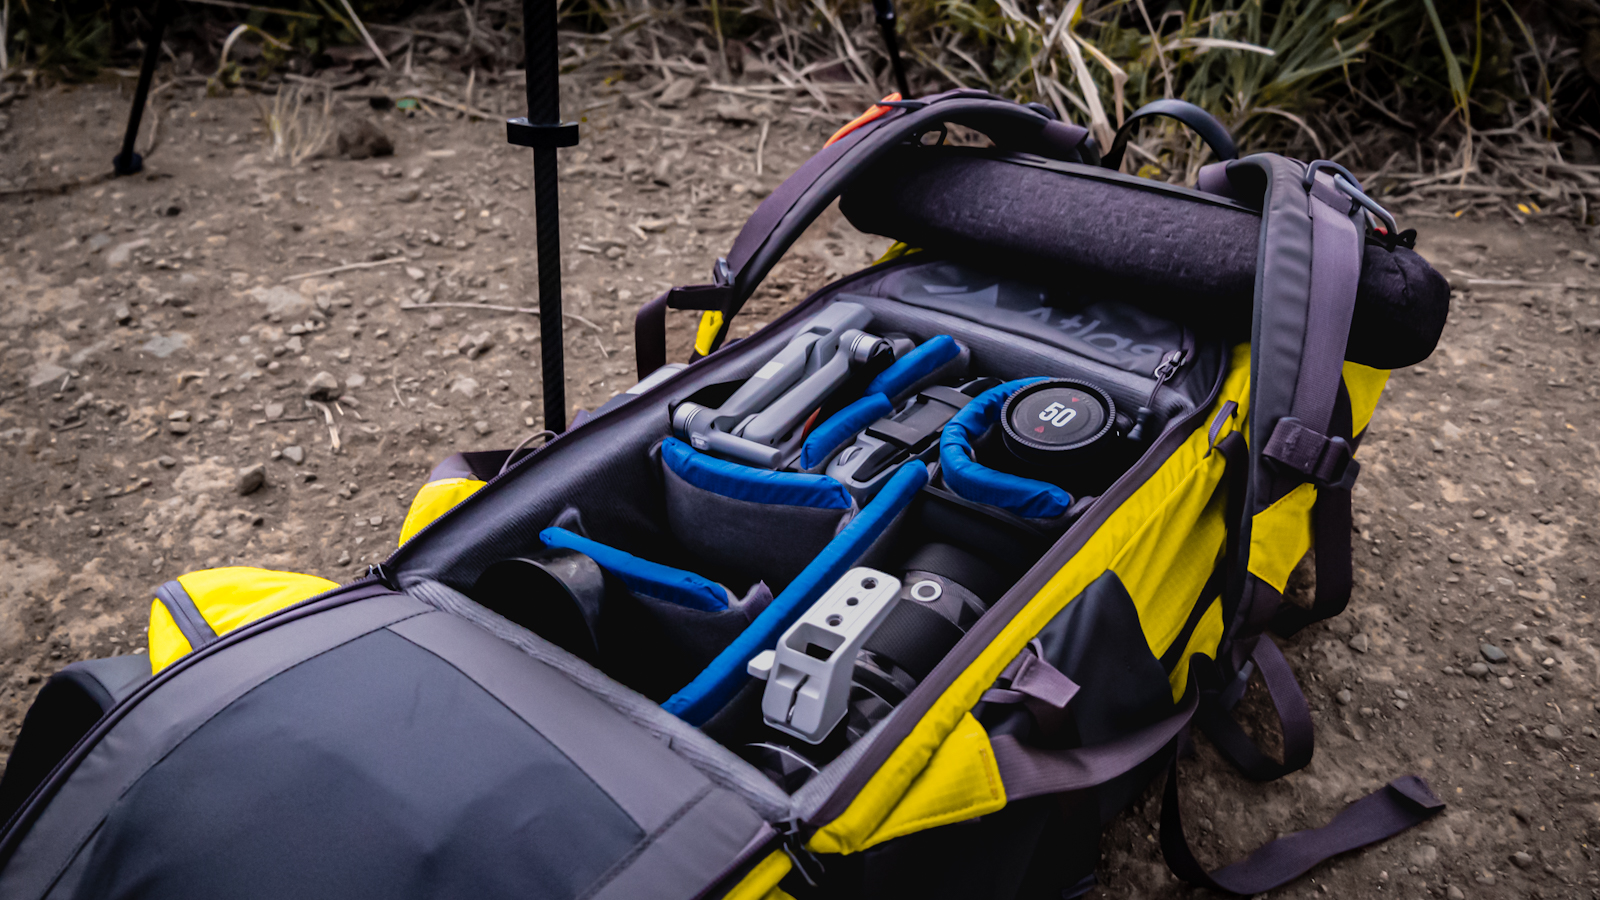
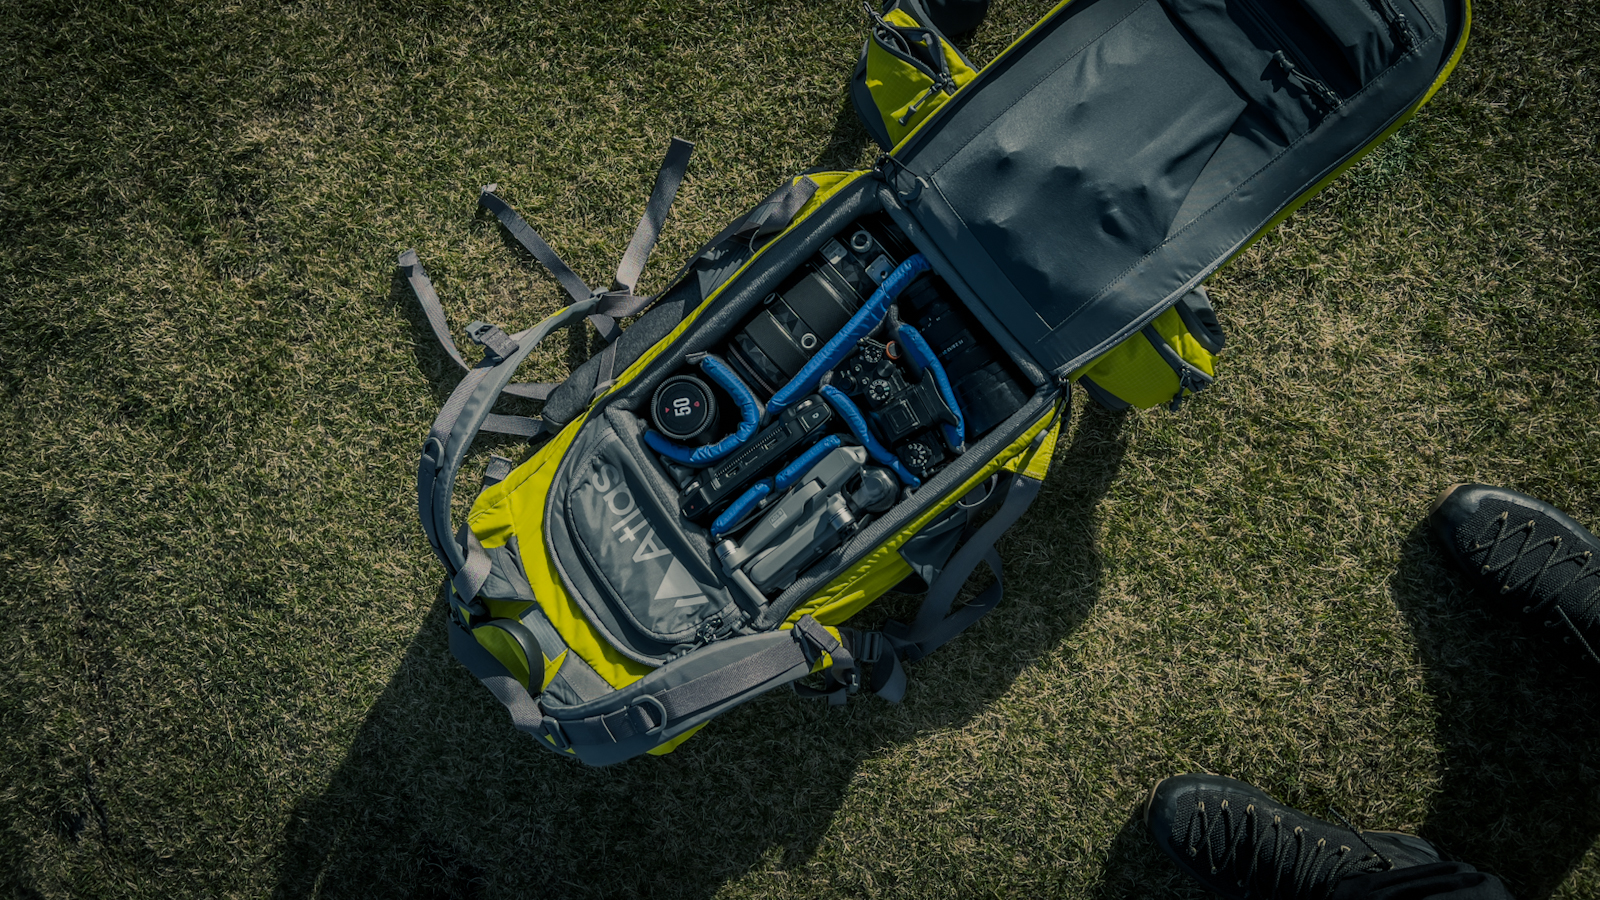
Now, a word on dividers. I often find myself frustrated by camera dividers. They are either far too rigid, and leave my gear bouncing between them, with no ability to be flexible around gear, or they’re poorly constructed, with fabric coming away from the foam. Once you start using that type, forget it, the velcro destroys the fabric and it ends up taking ages to customise your load-out. Thankfully, that’s not the case with the Atlas Athlete, it is truly customisable, coming with a varied set of 15 dividers, you can make this work for almost any set up. As you can see from the examples of mine, and the thorough examples on the Atlas website, no matter what gear you use, you can make this work for you.
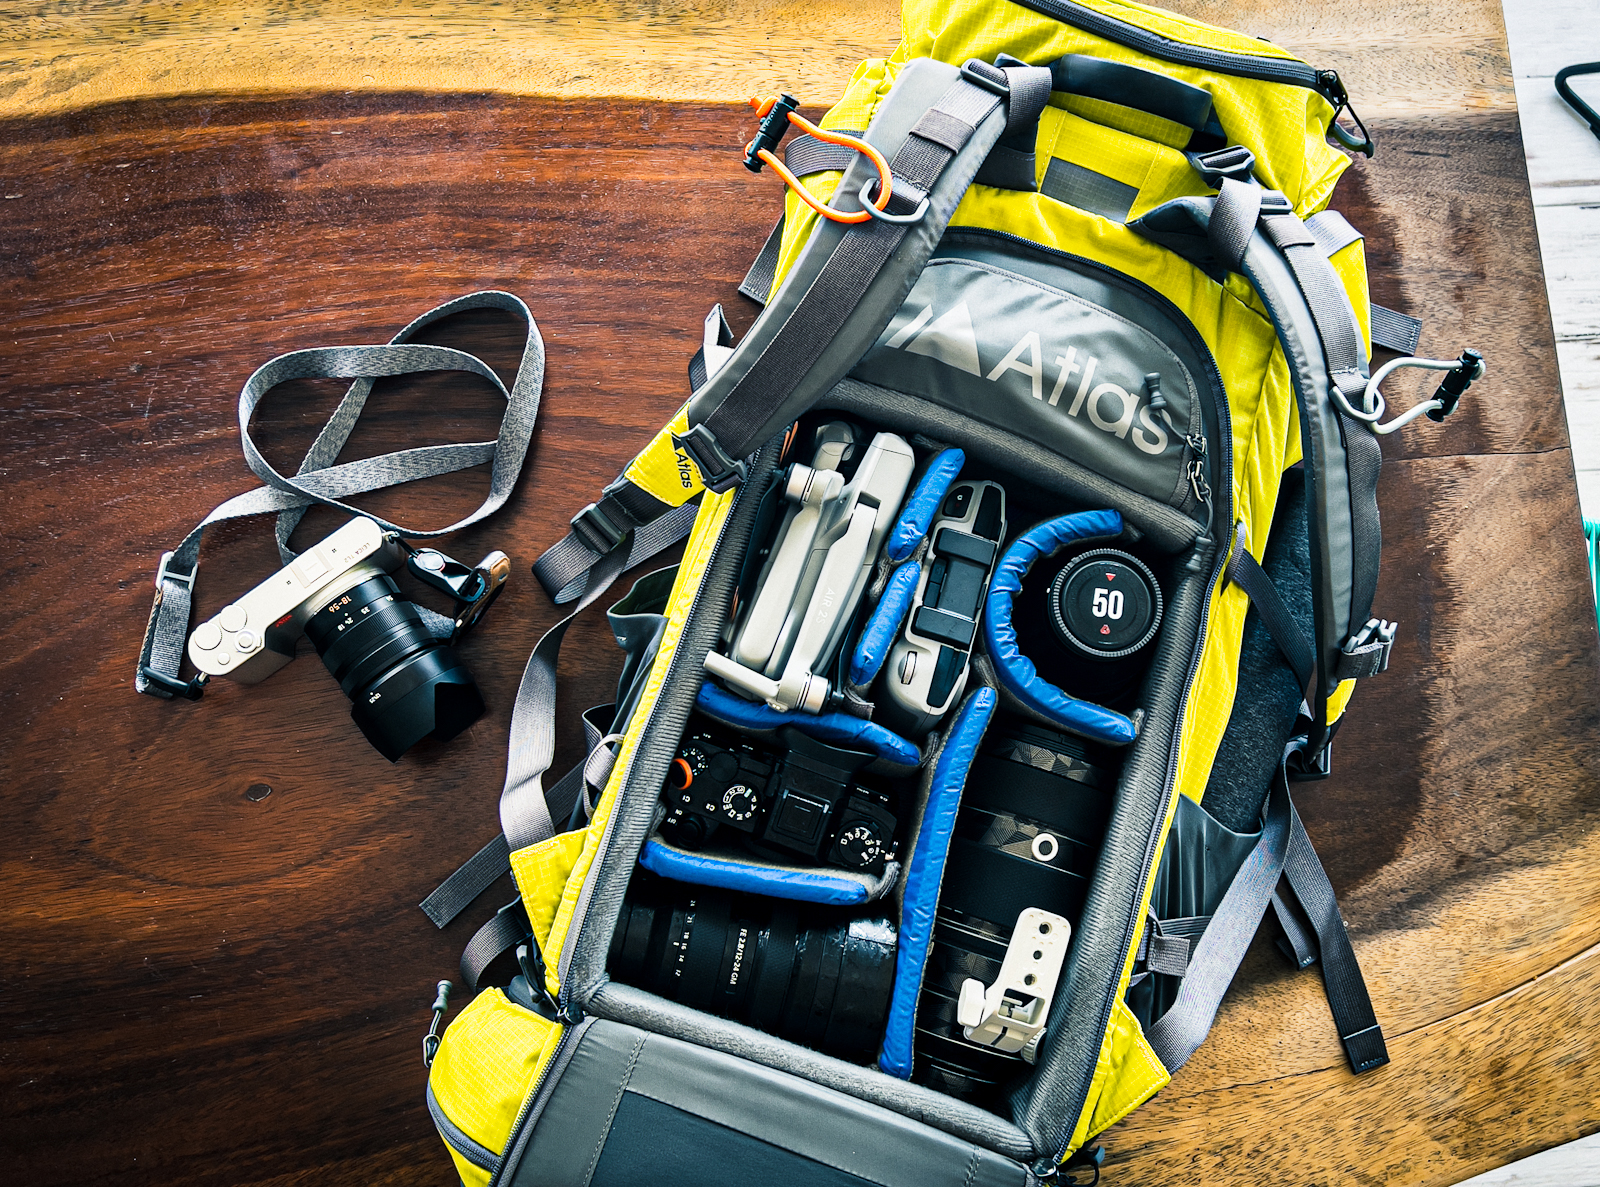
These dividers are a happy medium between what I just described, providing you enough protection to feel confident, but enough flex to make it work and squeeze that little extra space out of your pack. At 10mm thick with a soft to touch lining and distinct blue “top”. These dividers are provided to give you the flexibility that you need to carry and shoot well, and for something seemingly so small they do just that. No matter what variation you come up with, they’ll work for you. I’ve used it in a multitude of different variations while testing, but I’ve settled on a load-out that works for me: 1 x mirrorless body (two if no drone), 1 x 400mm telephoto lens (or two small primes), 1 x 50mm prime lens, 1 x 12-24 wide angle zoom, 1 x drone, and 1 x drone controller. This load-out worked perfectly for me when travelling, and gave quick and easy access to all of my gear without worry.
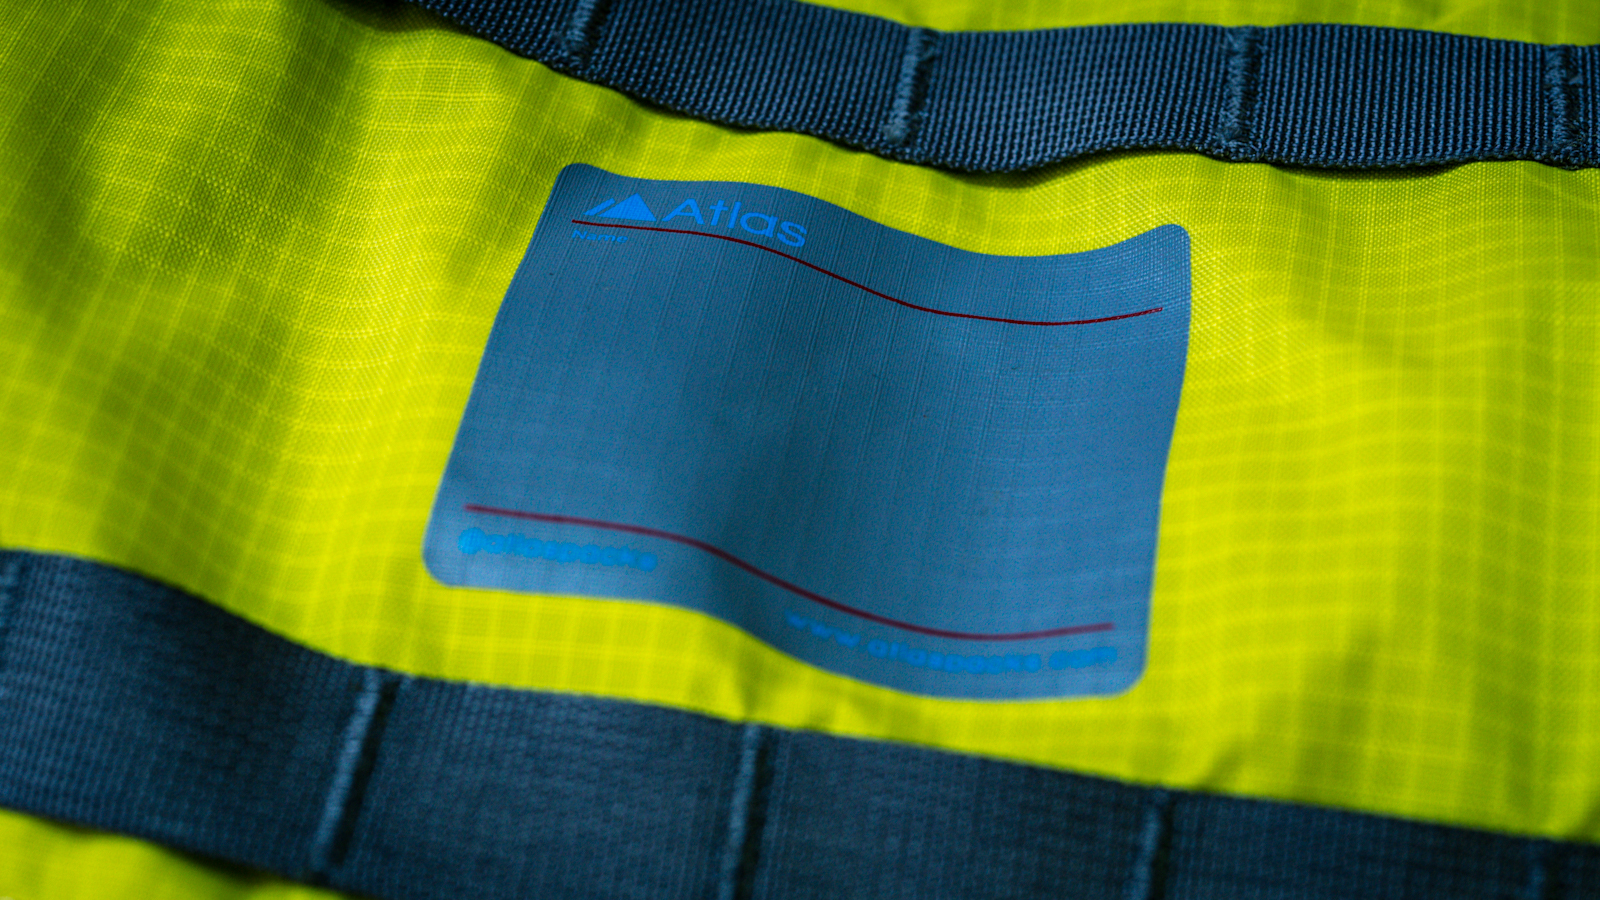
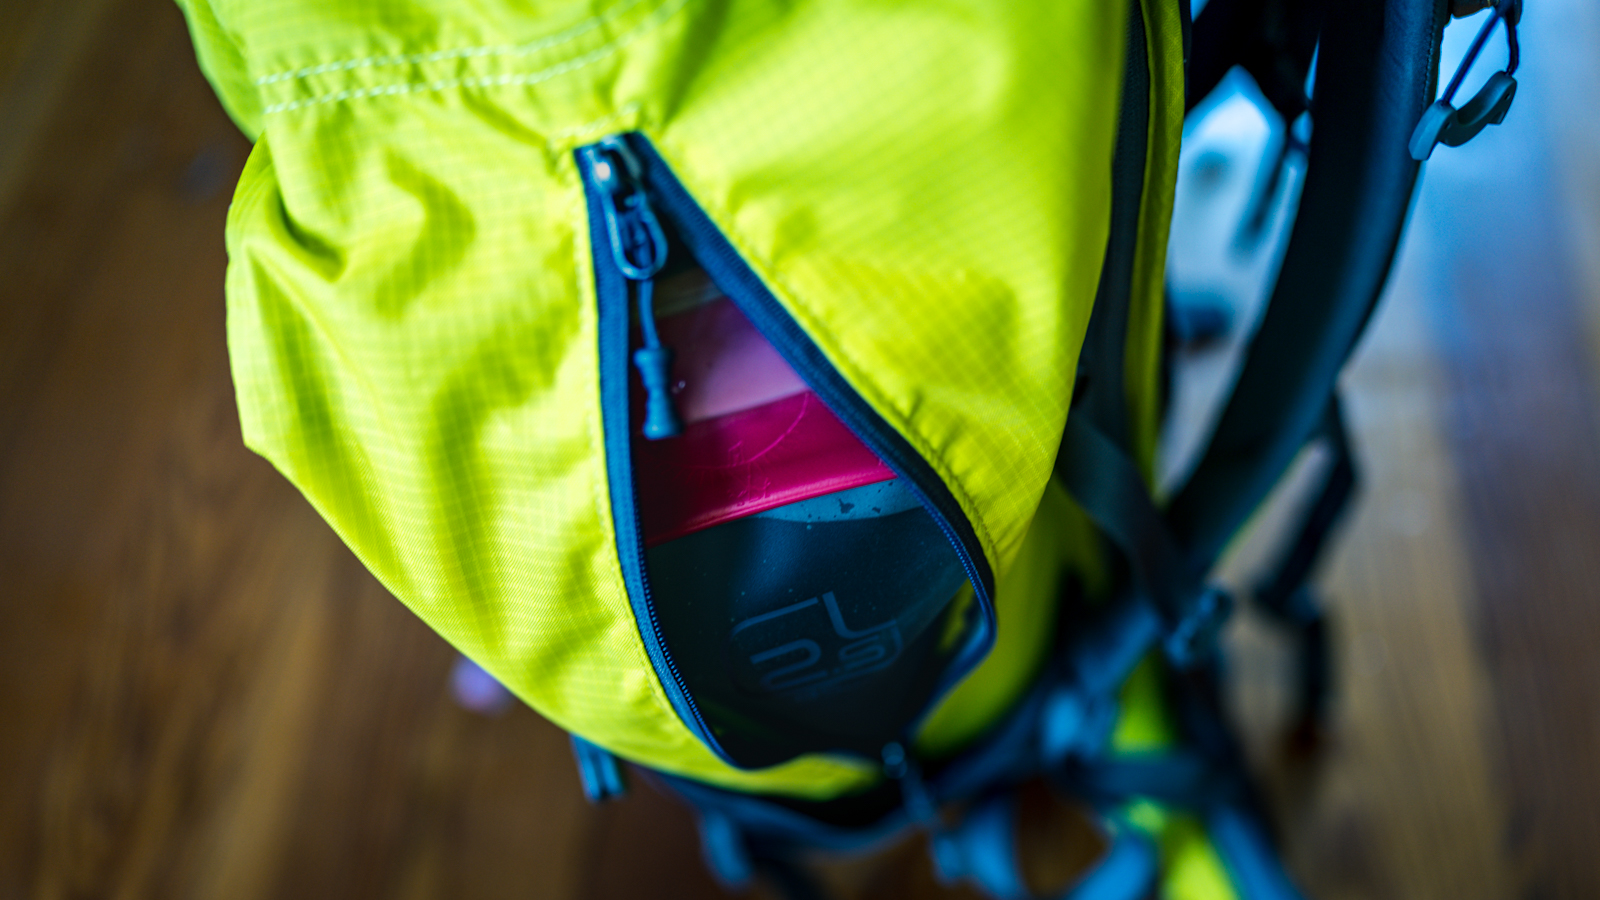
Outside of the OCC, the organisation continues. You have a top lid that houses a quick access outer pocket, then a larger pocket under that (excellent for hats, gloves, headlamps on sunrise/sunset shoots) and on the inside of the pack, there is another slender pocket with a spot to put your contact info. This lid pocket can hold a surprising amount, and becomes a great caddy for the smaller items that you want zipped up so that they don’t fall through the cracks.
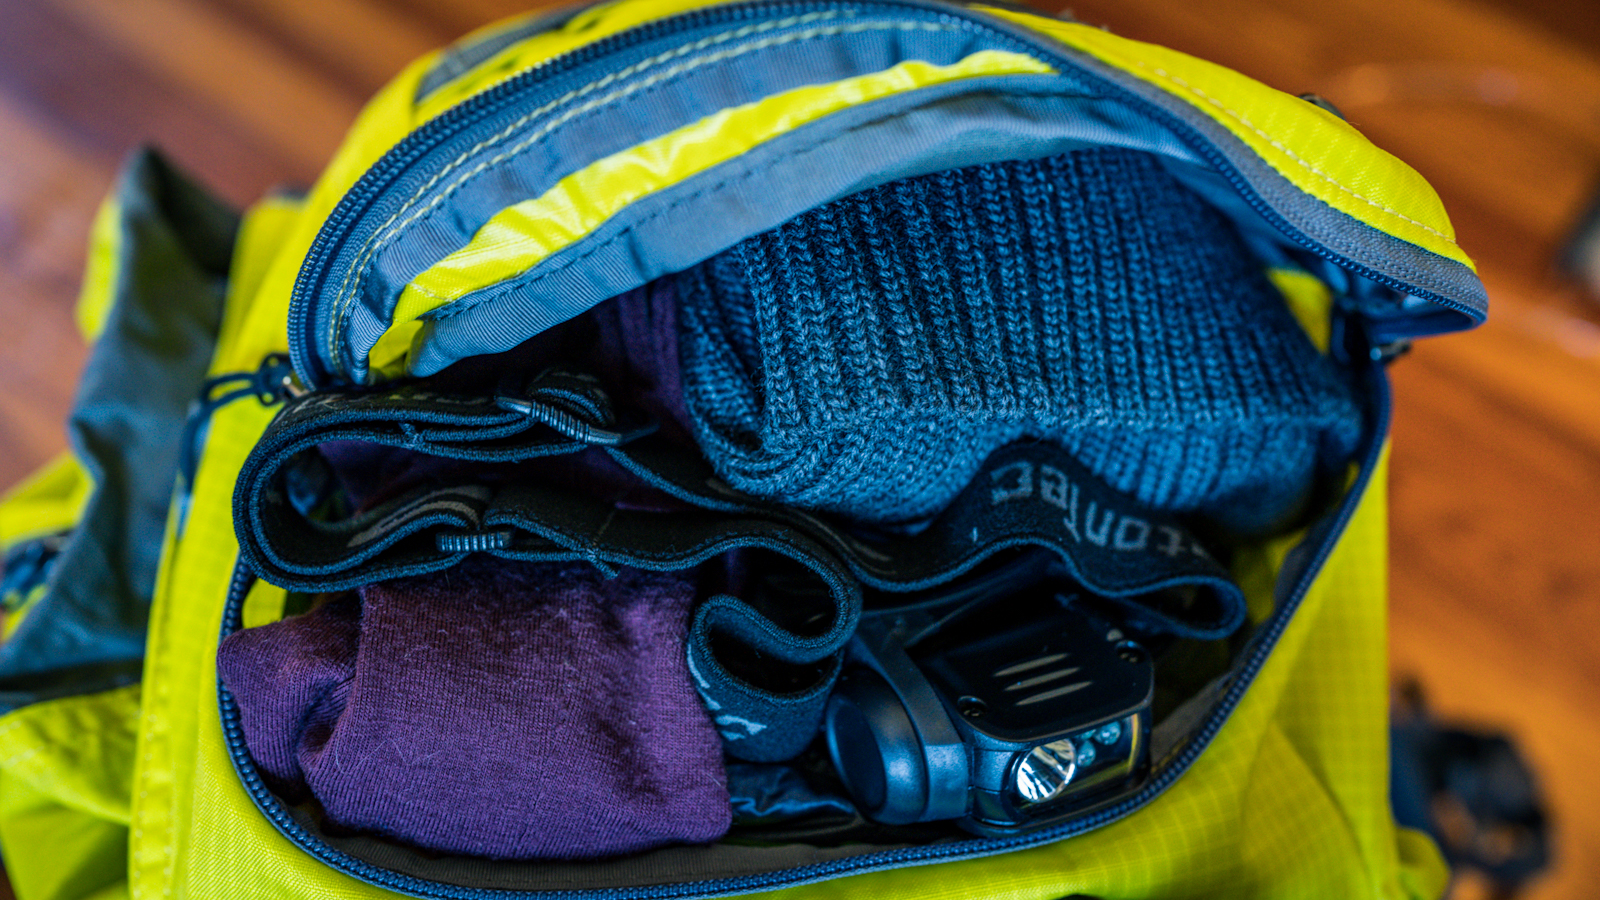
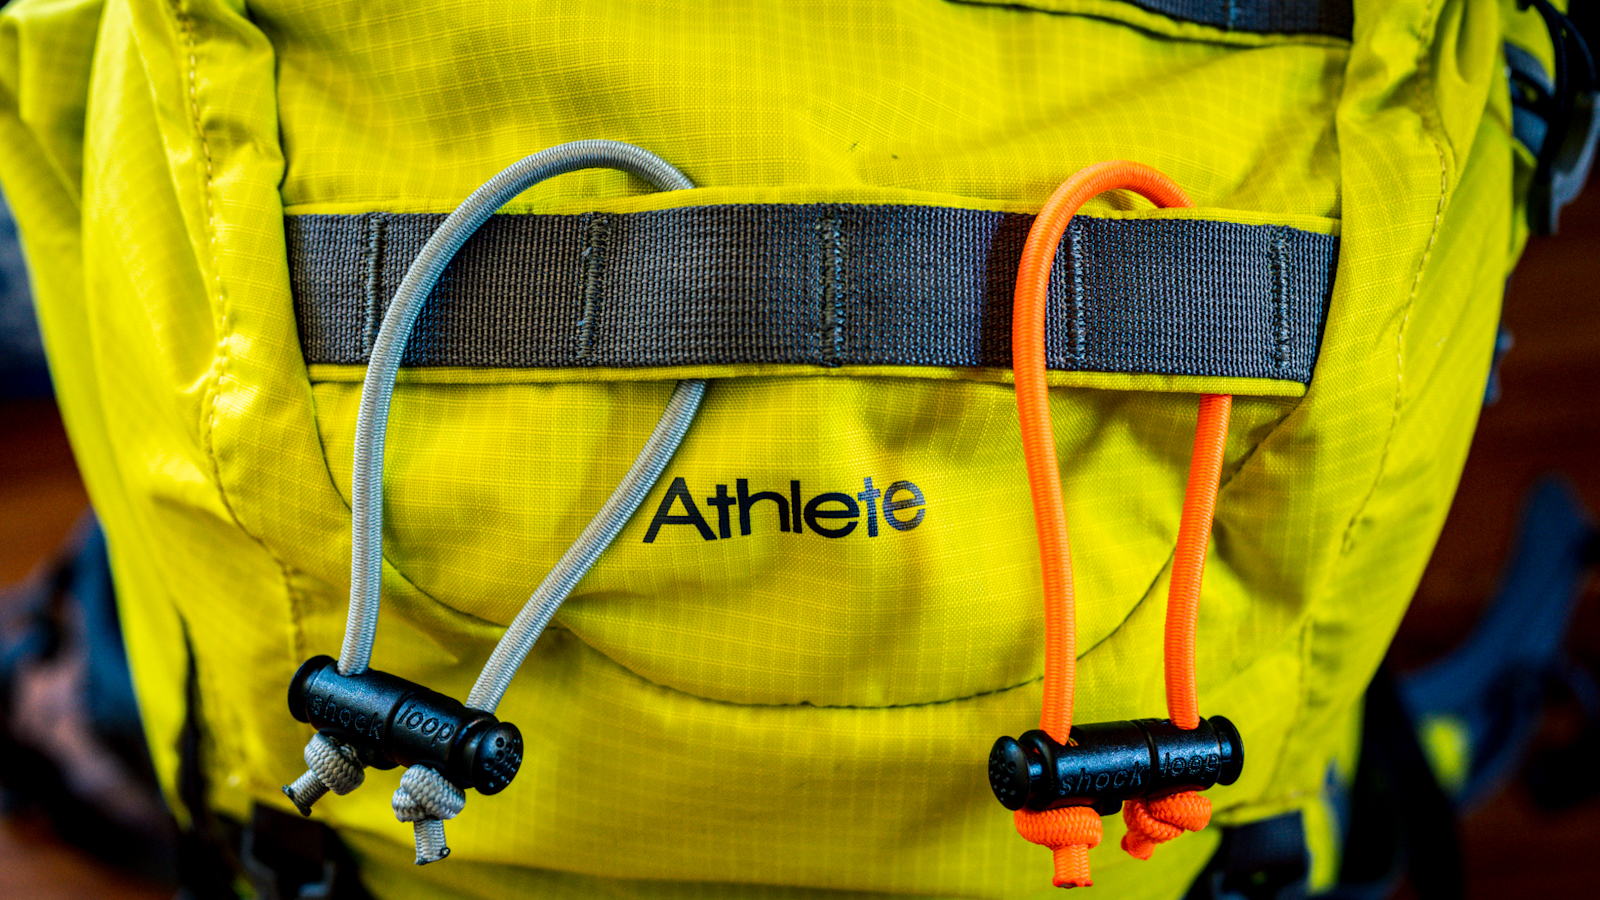
The lid also houses two rows of MOLLE webbing, which can be used to attach anything you might need–hero clips, guardian lights, hand sanitiser. You name it, it can fit there. This is where I kept my bungee cords which are just so incredibly useful, I didn’t use them all the time, but boy do they come in handy for things like hats, coats, shopping bags etc.
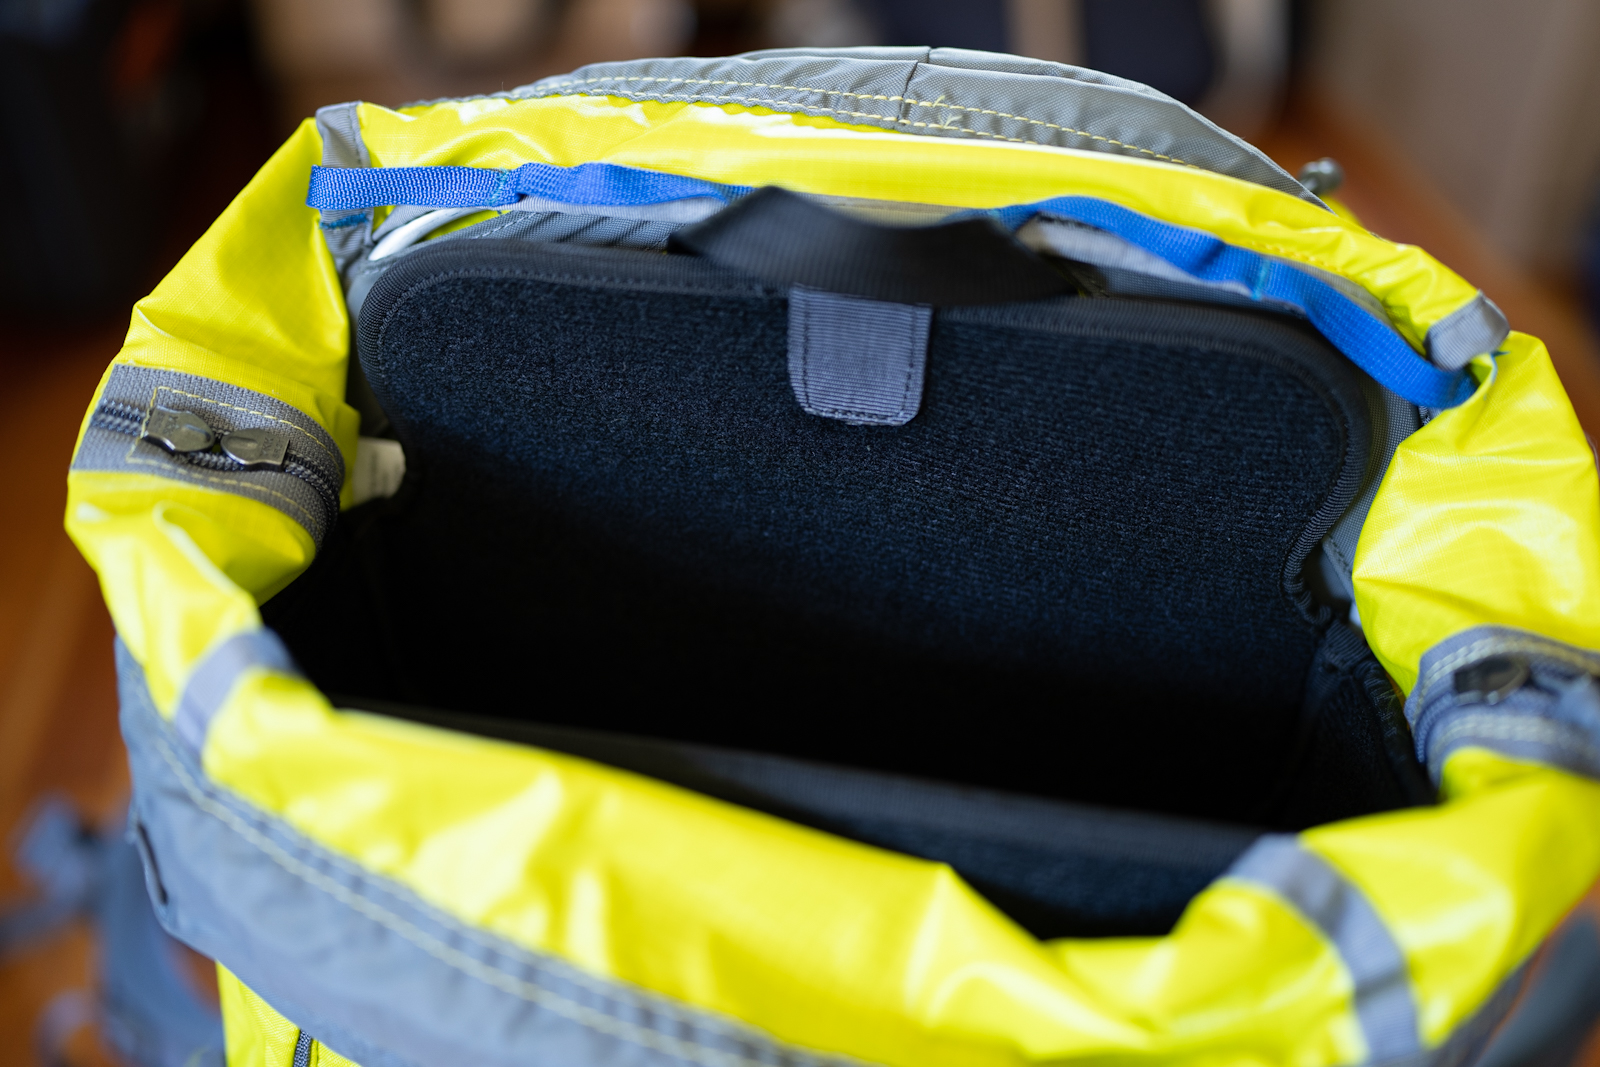
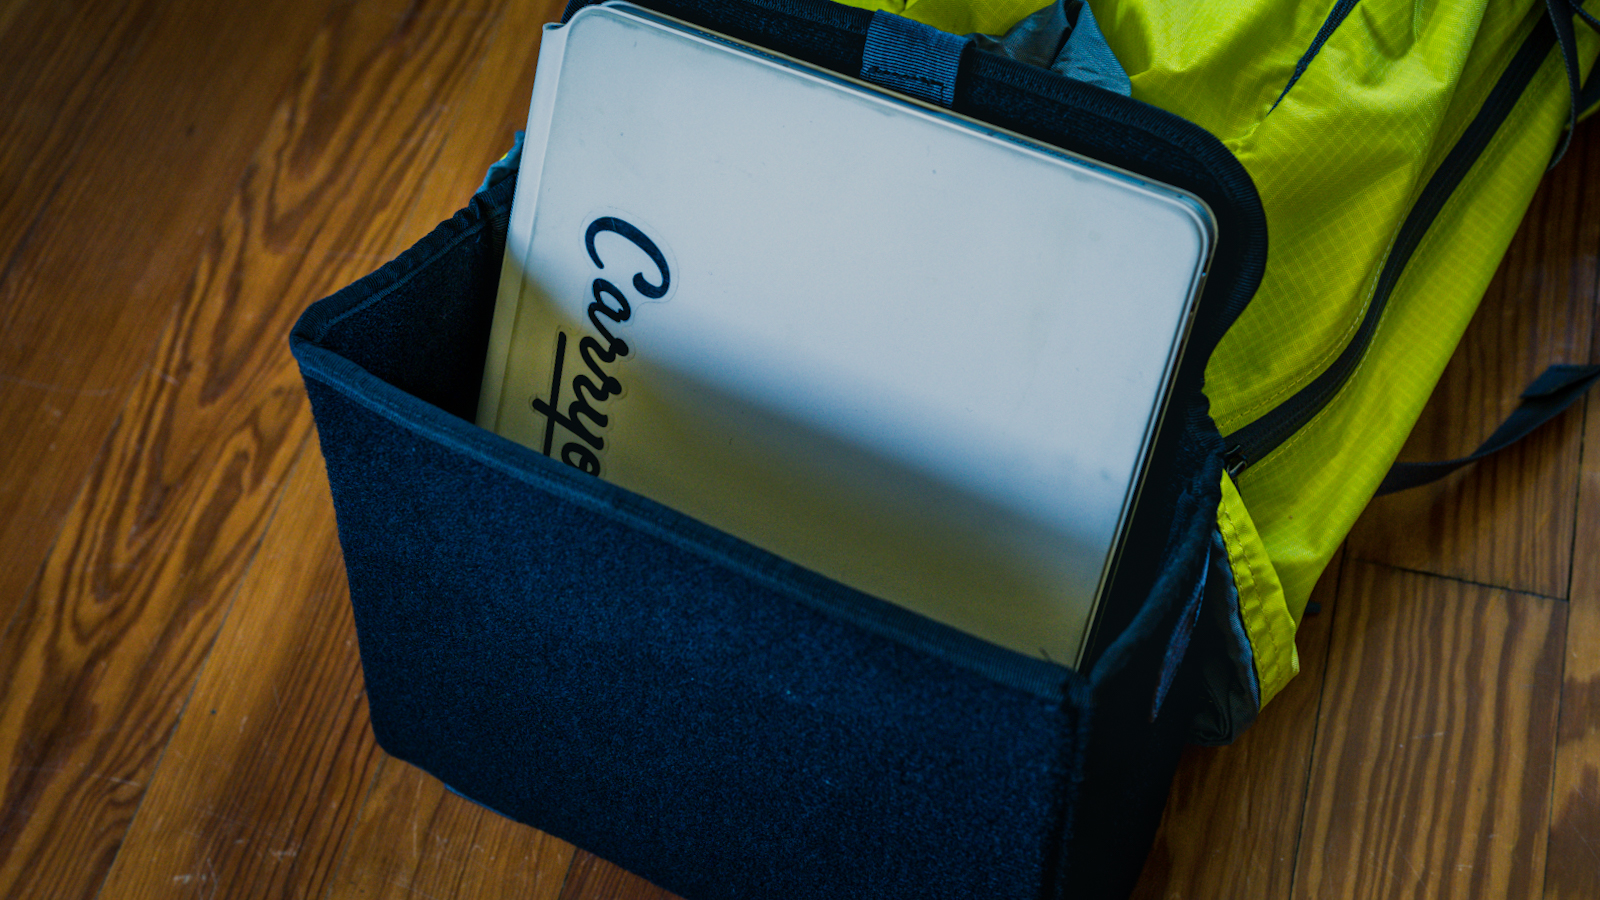
Once you look past the OCC and the Lid, you still have more organisation. On the back of the rear entry you’ll find two slim zippered pockets, these are perfect for remotes or batteries, and a large stretch sleeve which is well sized for microfibre or flatter parts such as drone propellers. There is an internal padded laptop sleeve on the “front” of the OCC, that sits inside the main pack. It can house a MacBook comfortably, and I found it to be well placed and easily accessible from the main drawstring cavity. Technically, you can even add extra protection by whatever you decide to place in the main volume, for example when I travelled on a plane, I’d shove a jacket in front of it, just for a little extra bump protection. In all honesty, I didn’t use the laptop sleeve much as I mainly travel with an iPad which I kept in the origami insert, but it’s nice to know the option is there.
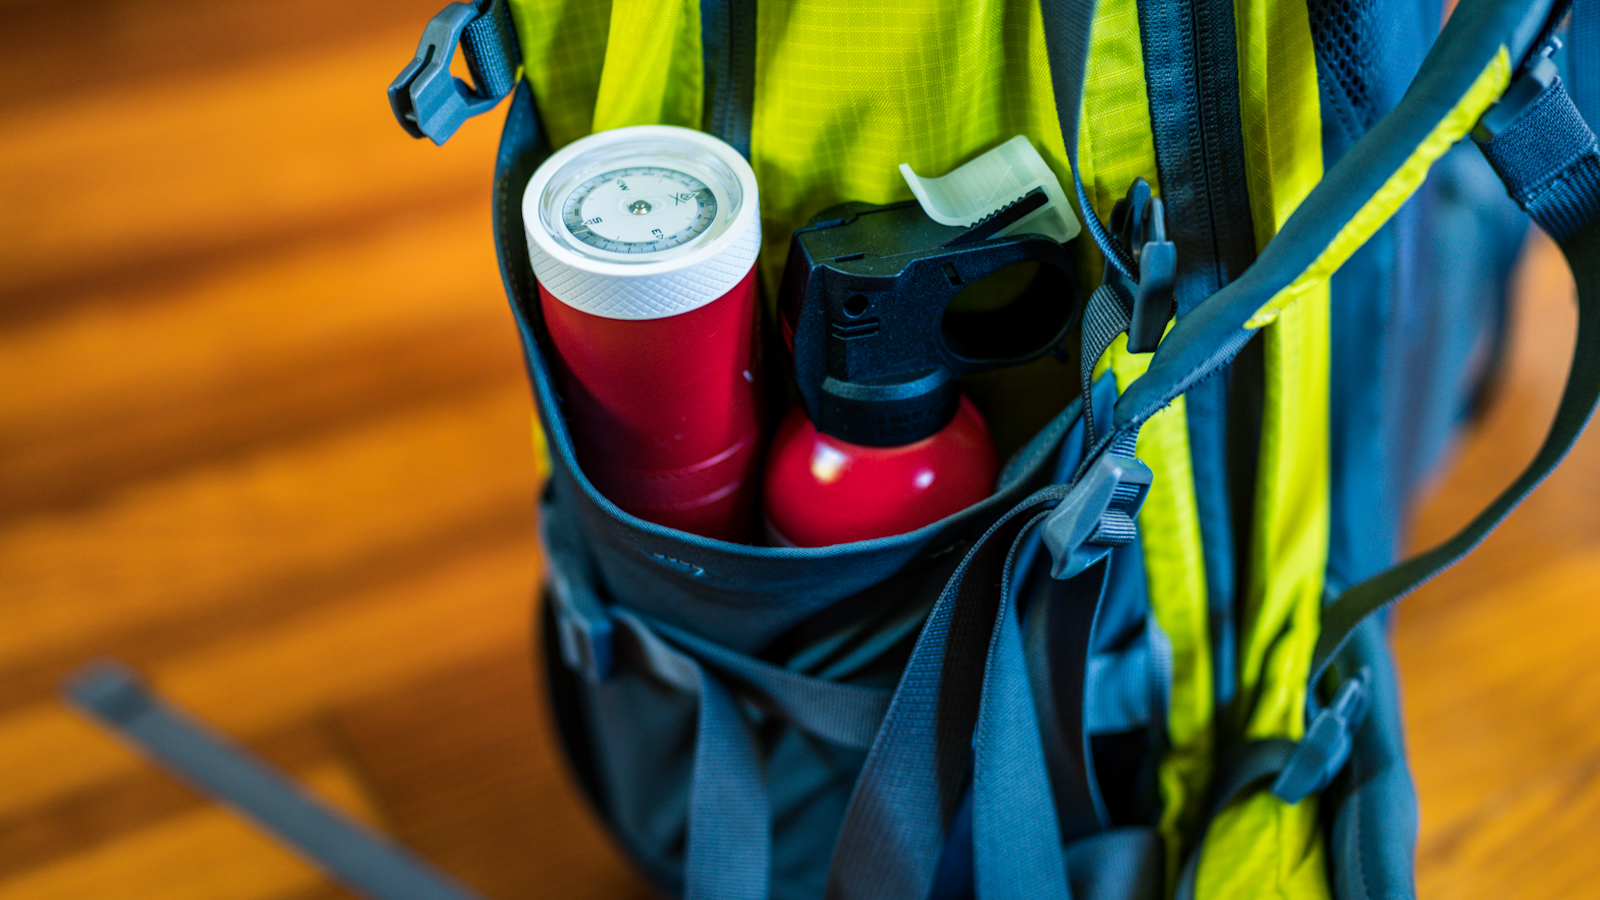
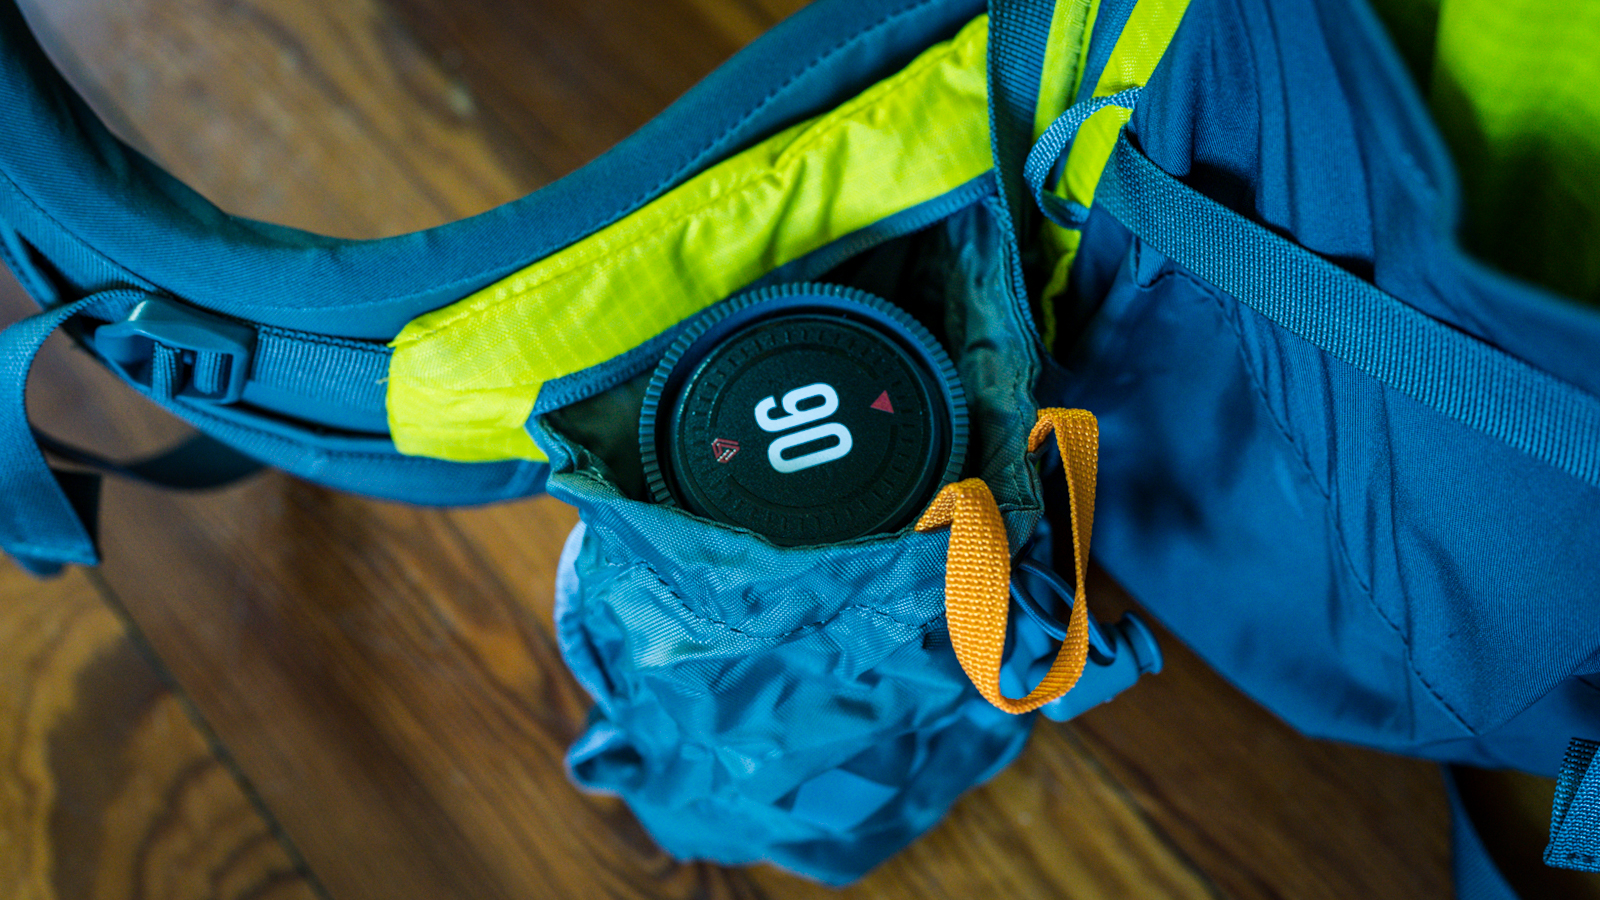
On the side of the pack you’ll find two large stretch water bottle pockets, easily big enough for a 48oz Nalgene, large insulated water bottle, or tripod. I kept a tripod on one side, and a first aid kit/bear spray on the other. They are easy to reach while wearing the pack, so it’s great to have those items close by!
On the hip-belt you’ll find two fold out dump pockets which can hold up to a 48oz Nalgene. These are also great spots for secondary lenses, snacks, phones, tools–and many other things I’m sure! While the front of the pack has a stretch mesh sleeve (with zippered vertical pocket) that can be a good spot for quick to grab items. I stored an insulation layer in here so that I could grab it quickly if I was getting chilly.

The organisation of the Athlete is really excellent and very customisable. Whether you want to use the pack at its most compressed 20L, or fully expanded 40L, you’ll quickly find a way to maximise its functionality. You have three access points on the pack, the rear opening to the OCC, side entry to either your water reservoir or your other stored gear, and traditional top entry via the drawstring opening. As with most of this pack, the variety is actually incredibly useful, particularly with thoughtful packing you can access different parts of your gear quickly.
It is worth noting that you can only access your camera gear from the rear entry. On the larger sized athlete, there is also a zippered pass through window that allows you access to the main storage cavity, this is useful if you need to grab something quickly while the pack is open on the ground. If you use the origami insert with the Athlete, your opening through the passthrough window is blocked.
The Origami insert is a limited release for the Athlete Pack and it elevates your experience of travelling with the pack. It is essentially a caddy that attaches (via velcro loop) to the top of the top of the OCC, in the main volume. It has the same origami fold, so the volume available in the insert will depend on your OCC load. It is a dream for airplane travel, I keep my e-reader, tablet, and headphones all in here and remove it from the bag before to keep with me at my seat. I’ve even used it as a side table “tray” in lodging while on the road. It stands on its own and elevates the organisation options of the Athlete Pack even further.
Comfort
Now most of the time, I don’t dedicate a whole section to comfort on a pack. However, it seems apropos here, because it is so critical to the success of a camera pack particularly under load.
With a slightly unique construction the foam and sponge used on the Athlete is both open cell and EVA foams. They serve a different purpose in different areas. The open cell foam is for comfort and padding in areas such as the shoulder straps, while the closed EVA is for support and strength in high wear areas such as the waist belt. Straight out of the box the Athlete is incredibly comfortable, but once you’ve dialed in the fit is when it really excels. You can book a 1-on-1 zoom fitting with Atlas Packs where they will help you adjust your pack perfectly, you can also visit their Arizona showroom for this same service.
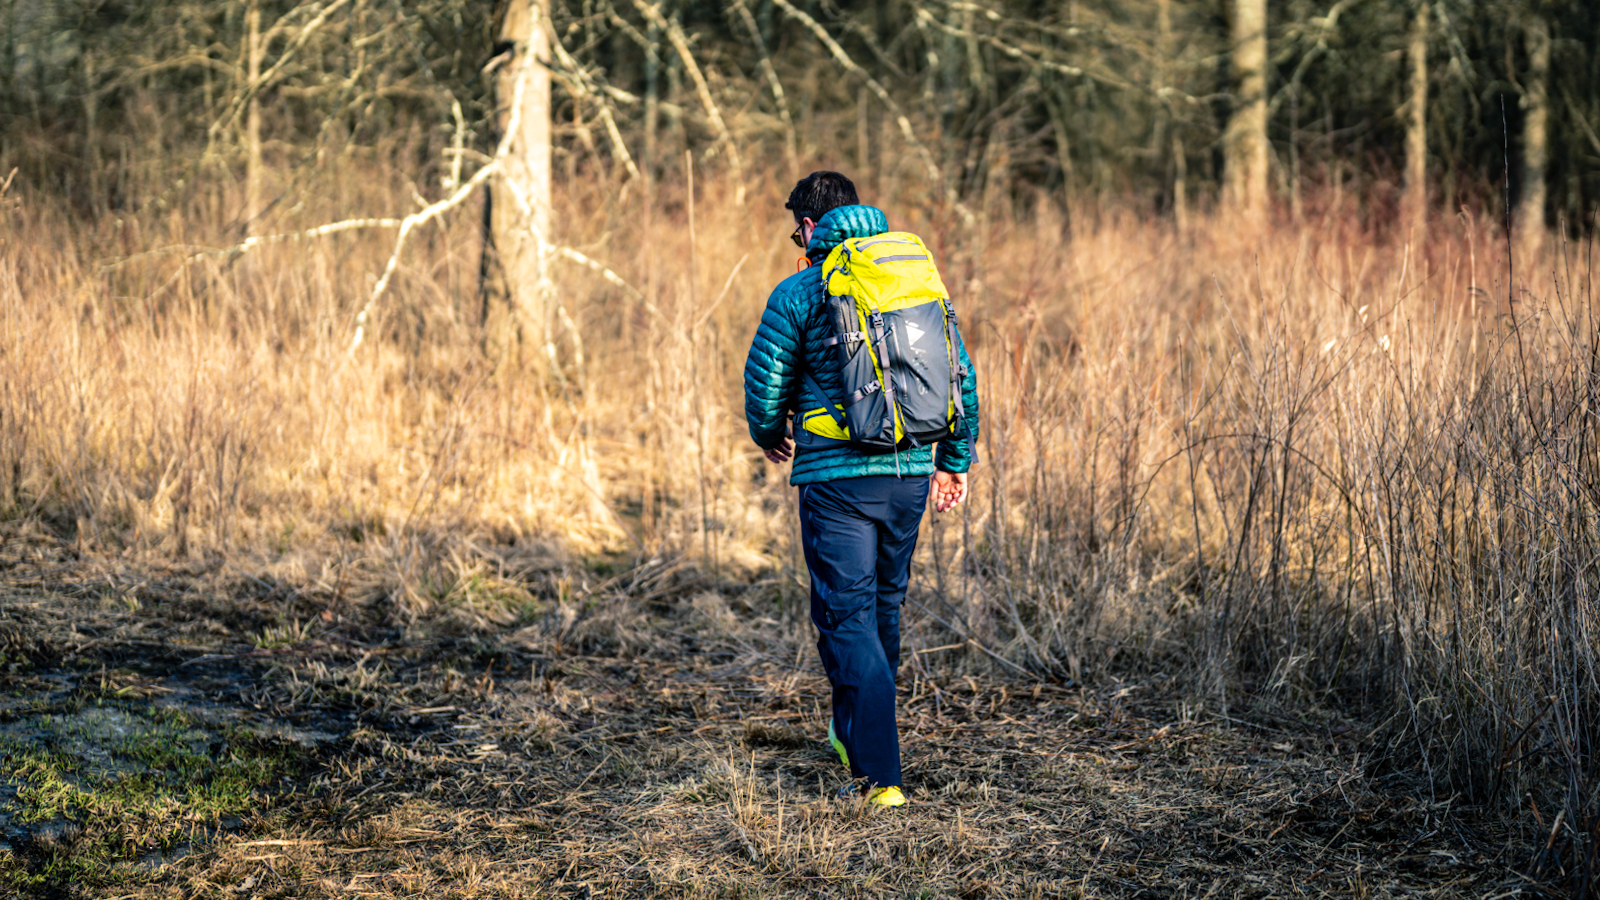
I was lucky enough to be with founder Allen at Outdoor Retailer this year, and I’d already been using the pack for a couple of months. He said to me “How’s the fit?” And I keenly responded “It’s great, I’m loving the…” before I could finish he said let me show you some adjustments. Within a short five minutes, the pack was floating on my back. The moment I got home I made the adjustments and I’ve been living with a happy pack (and back!) ever since. The load lifters, hip belt, and construction harmoniously work together to genuinely make this one of the most comfortable packs I have ever worn, and I don’t just mean camera packs. I mean packs full stop. I’ve used this pack without camera gear (okay, I did bring one camera with me, I’m an addict!) just as a hiker, and it performed exceptionally well there too.
Each pack comes with a custom hip belt. These hip belts are available in a variety of sizes, including big and tall and multiple styles based on overall load. All of these belts are compatible with all Atlas packs. The hip belt includes MOLLE attachments, excellent padding, and easy to use magnetic fastenings. The hip belt is another example of Atlas making their packs function focused, so that you can focus on the adventure at hand.
Comfort cannot be taken for granted when you’re on your feet all day with expensive and heavy gear on your back. The back panel breathes exceptionally well, I’ve used this in climates ranging from 0ºF to 110ºF on my travels and not once have I felt discomfort from the pack, just the hostile environment. I would go as far to say that the comfort of the Athlete is the foundation of what makes everything else on the pack work so well.
Verdict
Atlas Packs are great for all of the reasons that I’ve listed in this review, but not only is their product great, their ethos and customer service is too. Each Atlas pack comes with a lifetime warranty, 100 days to trial or return and exchange, 1 year theft protection and online fittings via zoom call. These services aren’t marketing ploys, they come from a place of genuine care for both the product and the customer. Founder Allan Henry, renowned photojournalist, designed this pack as a solution to a problem, we often find those products to be industry leaders because they aren’t focused on gimmicks or “keeping up”, they are trail blazers and want to create the most functional and useful product they can. That is most certainly the case with Atlas Packs Athlete Pack.
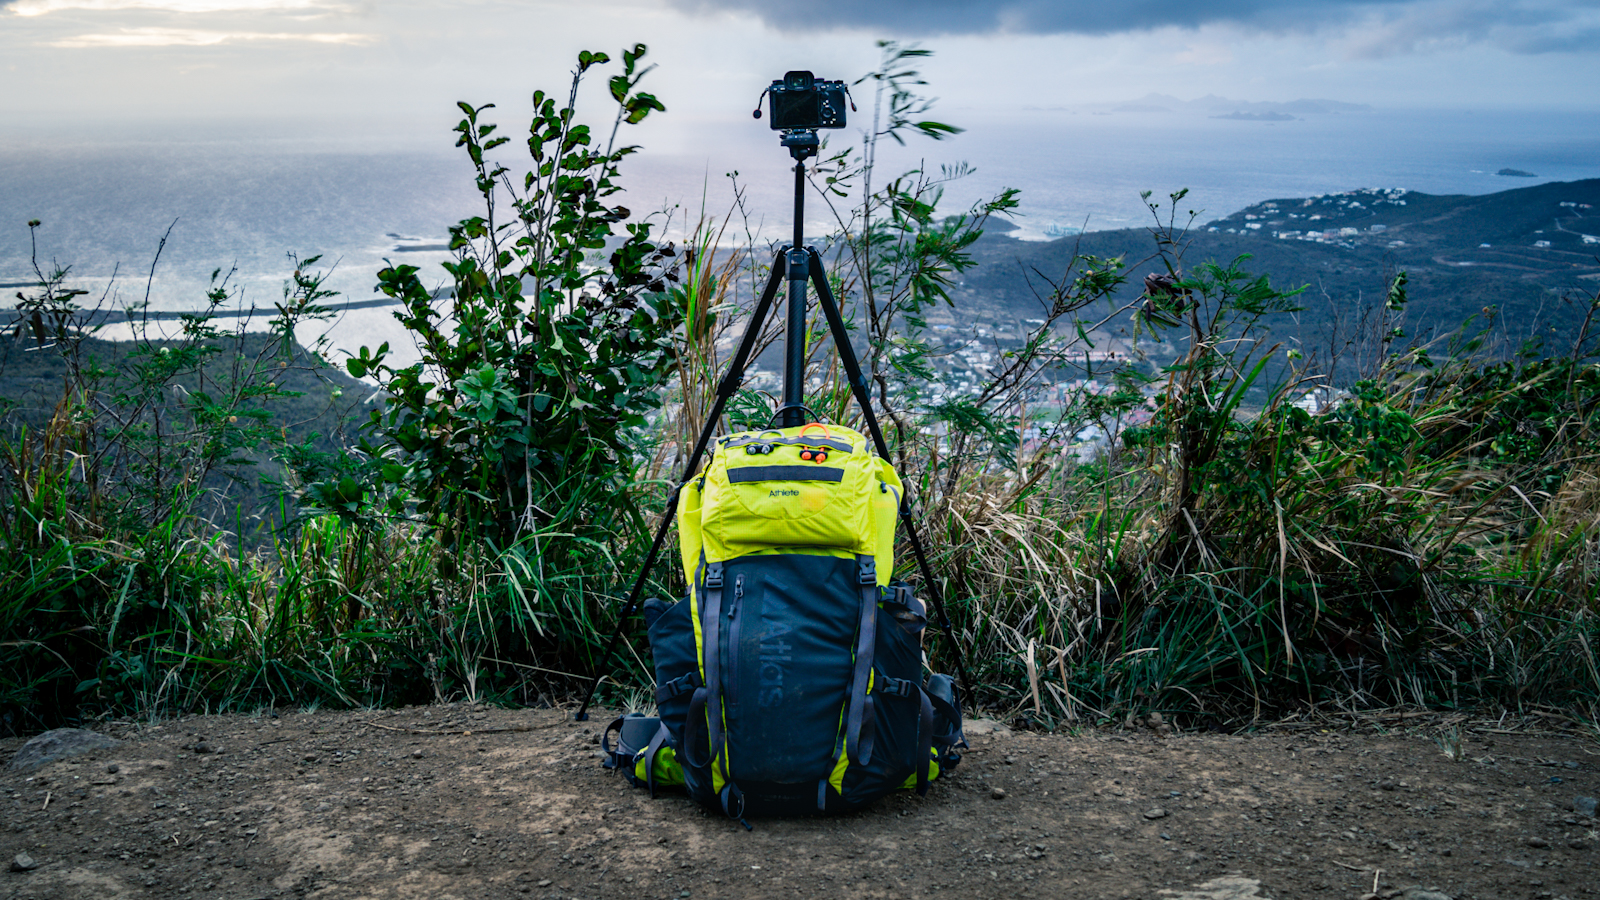
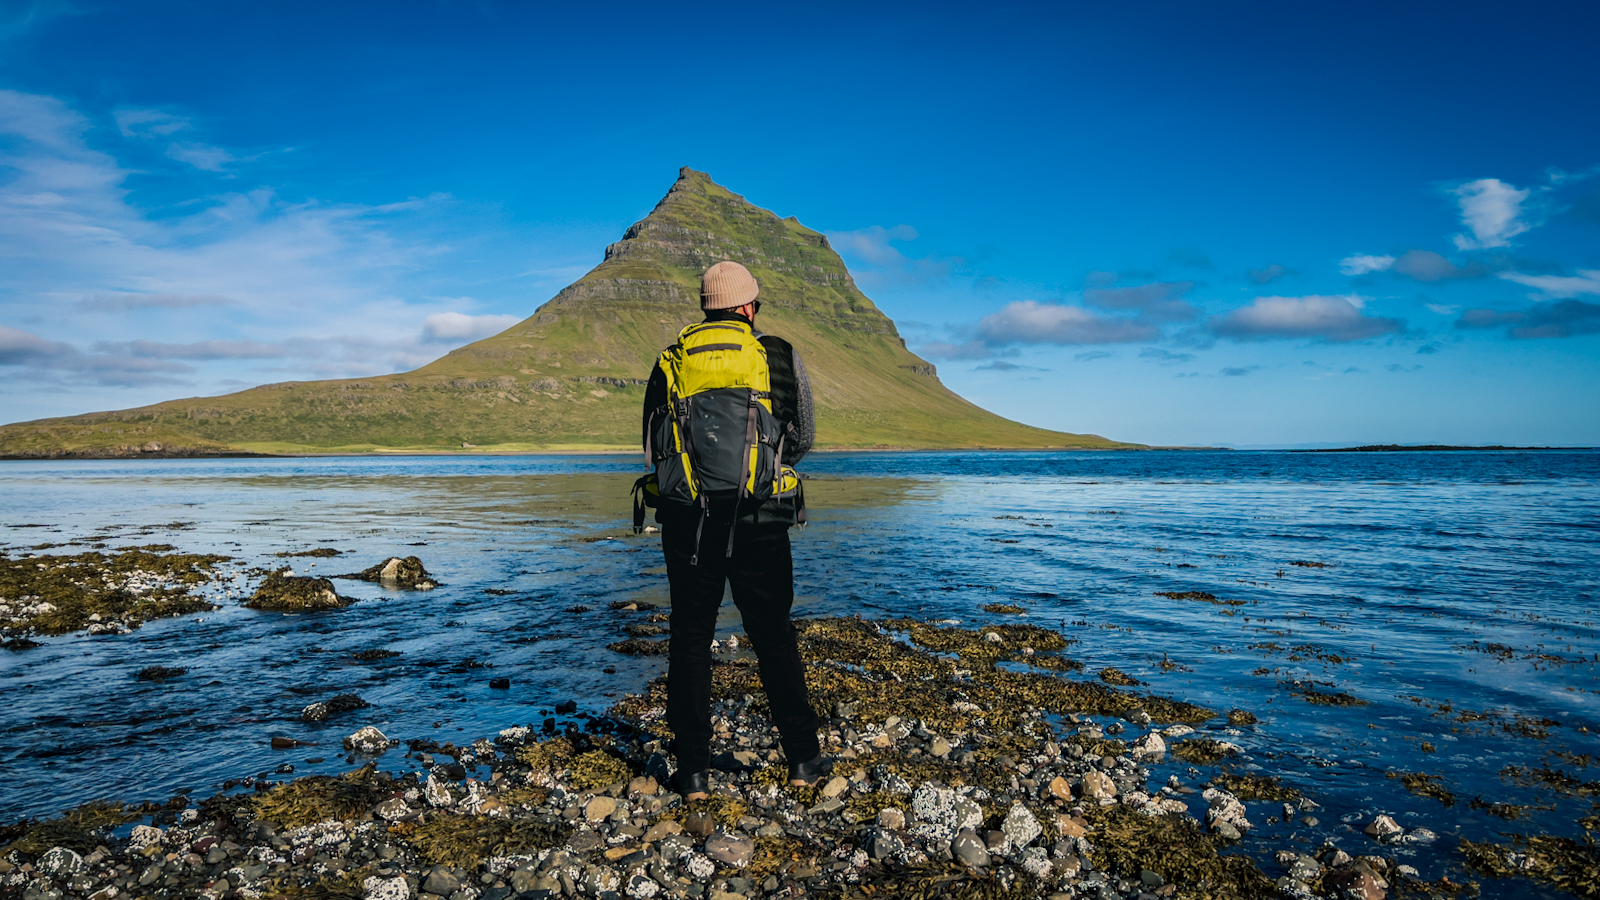
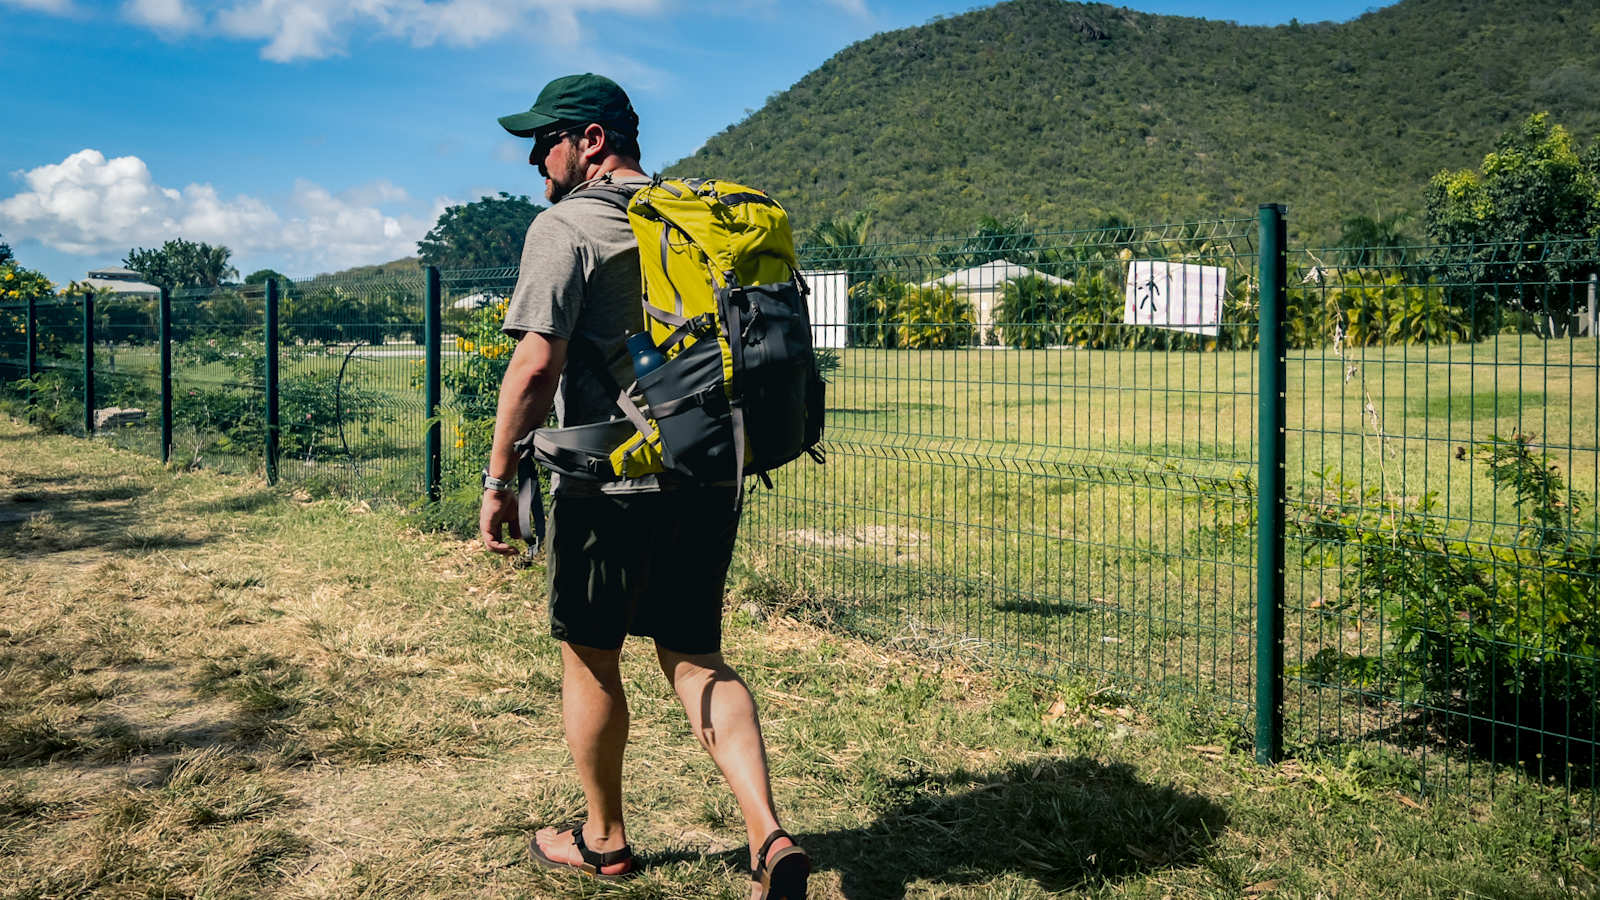
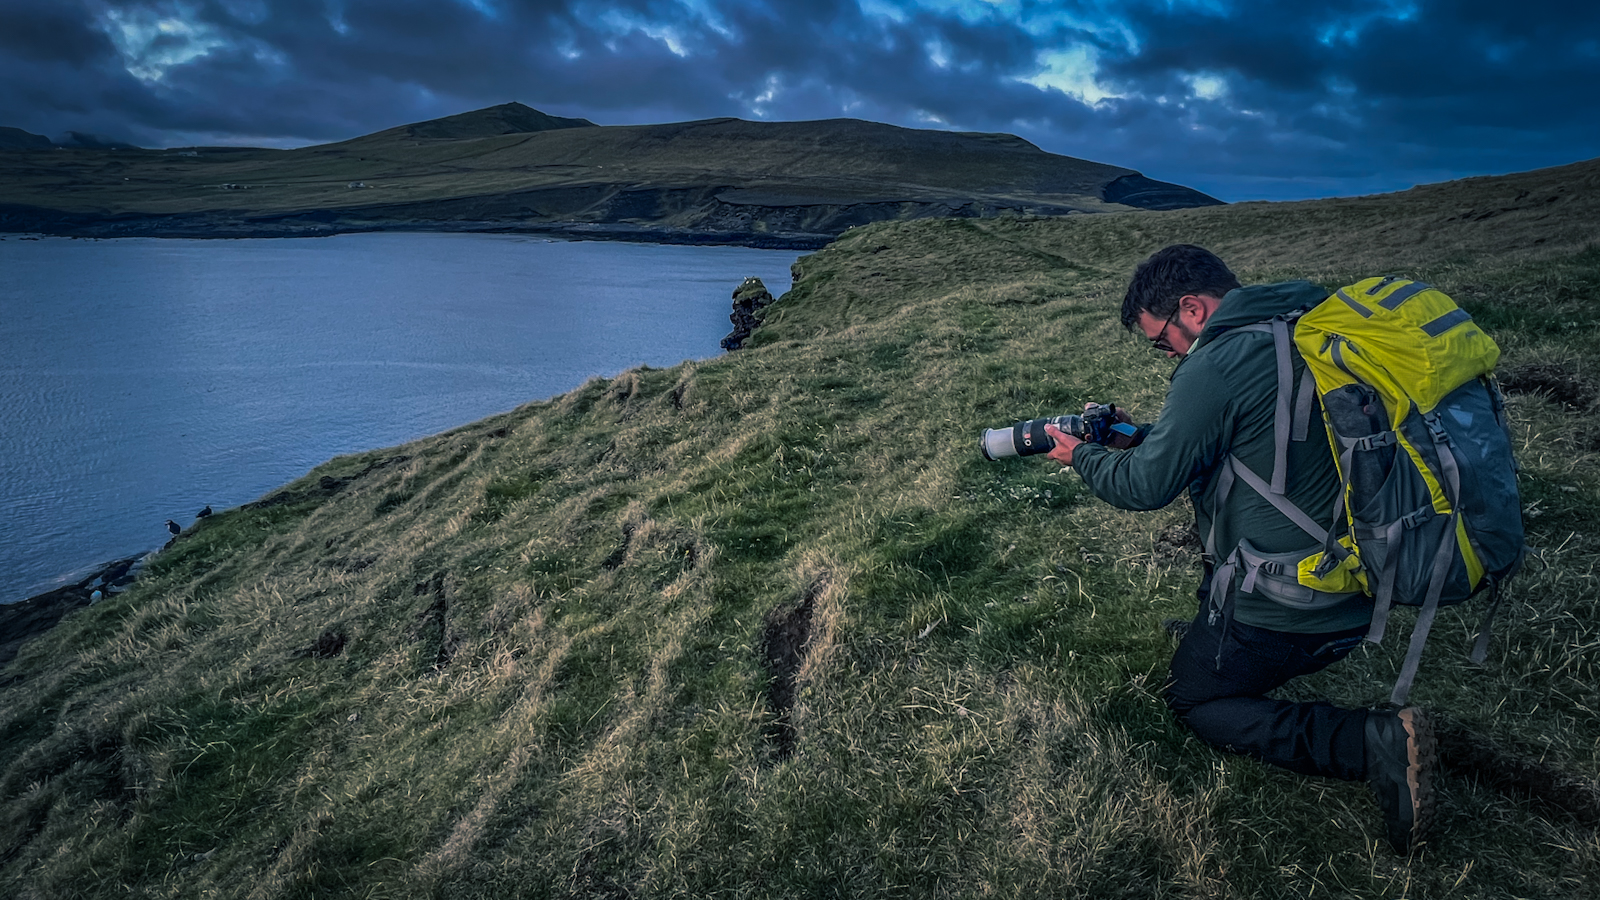
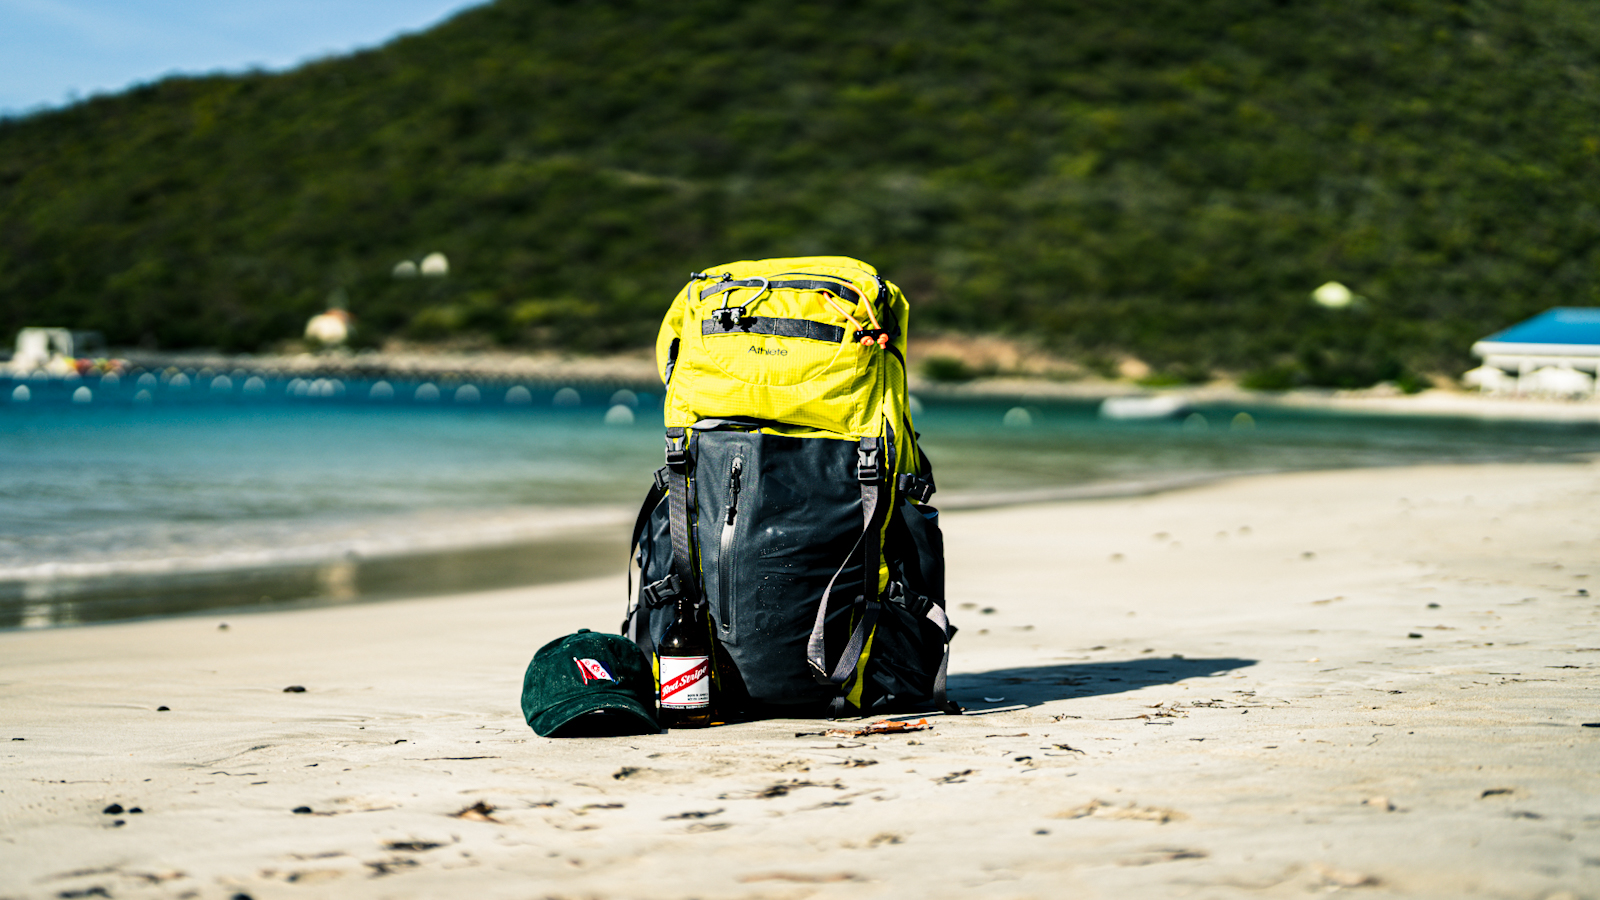
As I’ve alluded to, the success of a camera pack in my eyes is all to do with how well it lets you focus on the job or task at hand and this is where the Athlete truly excels. It is a portable studio, and you become more and more comfortable and in sync with it the more you use it. In my case, the Athlete Pack has travelled with me to Iceland, St Martin, and all over the USA through winter, spring, and summer. I’m yet to find a climate it can’t face, or a use case where it really falls short. I’ve dragged it across cliffs, beaches, airport floors, airplane overhead bins, taxis, sidewalks, and it keeps up every time, it’s hard not to admire its grit!
Multiple access points, robust materials, excellent protection, reliable construction, and thoughtful touches make this the most enjoyable camera pack I’ve had the pleasure of using. It’s no Nomin in its aesthetic, but it isn’t designed for that, nor is it trying to be, this is the photographer’s Pack Mule that you didn’t know you needed until you used it for the first time.
Over my ten months with this V2 updated pack, I have traveled with it extensively, and not just because I’ve been testing it, but because I’ve trusted it and wanted it with me on my adventures. That is the greatest compliment I can give a camera pack, I want to use it, and I can’t wait to see where the Atlas Packs Athlete Pack takes me and my camera gear next. After all, a happy pack is a dirty pack.
The post Atlas Packs Athlete Camera Pack Road Test Review appeared first on Carryology - Exploring better ways to carry.